The 4.19 update has added some unusual shadow artifacts to some fur presets such as Polar Bear. As a temporary work around enable Normal Map and set Normal Strength to zero. This will alter the shading slightly but also resolve the shadow artifacts.
Just purchased this shader.
About the brush direction, I see that we can adjust the direction of fiber flow using the RGB channels. I’m not sure I understand how that works exactly, but easily enough I can play with the settings in a material instance to get results. But, lets say I want certain parts of a models fur to flow one way or another. I need a texture map to drive that behavior, but I don’t know where to start with that. Would it be something like, separate the model into RGB colors, and each RGB value I can then control separately? So an animals legs I make red, its torso I make blue (just a simplified example), and then in engine I can adjust those values to get the right flow?
***edit - I’ve answered all questions except one : is it possible to append my own normal map to act beneath the fur (for muscle detail)?
No documentation yet besides the examples I’m afraid.
The brush direction is a global setting. I have tried it with a per-pixel setting but the fur tends to look wrong with sudden changes of direction. If you want to try it you can edit the material and substitute the colour parameter for a texture parameter that you then paint in tangent space to get the direction you want. Alternatively I can make the remaining three channels of the vertex map be the brush guide, which may work better since you can paint a direction directly on to the model.
I hadn’t thought about doing a normal map under the fur. I can give this a go and send you the shader to test if you like. Send me your email address in a PM.
No problem, thanks for the reply.
One more question if you don’t mind : Using a typical material blend setup like you might find a tutorial for on youtube, I think I should be able mix two fur materials together. Idea is to have two material instances that are almost identical, but one has normal multiplied more so you get a clumped fur look more than a soft fur look. So in certain spots, like the bottom of the neck and the chest where fur natural kind of forms into chunks, I can get that look by just blending the second material in.
I’ll give it a shot either way, but I’m not experienced enough with this stuff to know if I am doing things wrong or not when they aren’t working.

Depending on your UVs you’re able to define a full-body hair texture, so you could use this to control fur density in specific places. I’ve never looked at material blending but it’s something I can check out for you.
You can also use a texture growth map or vertex painting in the same way to get longer fur in specific places.
I’ve used the vertex painting to get shorter hair in key places like around the face and lower legs, and I did check out the growth map and made a test – but this is more like inflating the vertices along their normals. A useful thing that I’ve used to some effect, but unfortunately it doesn’t give the specific result I want to simulate “clumped” fur.
So that is why I started thinking that to get the effect I envisioned, probably the best way would be to blend a separate material, but the next best work around would be to duplicate some parts of the mesh and apply that material to those floating pieces.
Not the best example, but my other photos were too large. So notice how different the properties of the lower neck fur is compared to elsewhere. I’ve been able to get a decent replication by playing with some values like the normal multiply, but of course this changes everything globally. So I know material blending is a common thing people use, the question is just how complicated it will be to integrate with this shader. Hopefully not too much trouble because it will be a very powerful tool.

I would definitely try clumping it with a combination of a 4k fur map and the brushing stuff I’m about to send. 4k might not be enough either, there’s a way to enable 8k textures as well.
The clumping seems pretty well simulated just with by using the color map. I mean, maybe it could be done a little better, but I am happy with these results.
I still have some bug preventing me from using vertex painting to change the length – I took a look at the master material and saw that indeed the alpha channel was going to the right place… it is something I will look at a little further in the future, but for now this model is at a good finishing point and I’ve got to move on. But man! I can’t wait to make some more furry critters and put this shader to good use.
Thanks again for the excellent asset and prompt support!
Excellent work!
I’ll release that update to the marketplace ASAP. Thanks for your time!
Regarding the fur length vertex channel, it works to reduce the length rather than make it longer, so default the vertex alpha value to 100% and then set the fur length and growth to the maximum length you want, then paint it back by using an alpha value of less than 1.0.
I still can’t get over how good that looks. You are a magician.
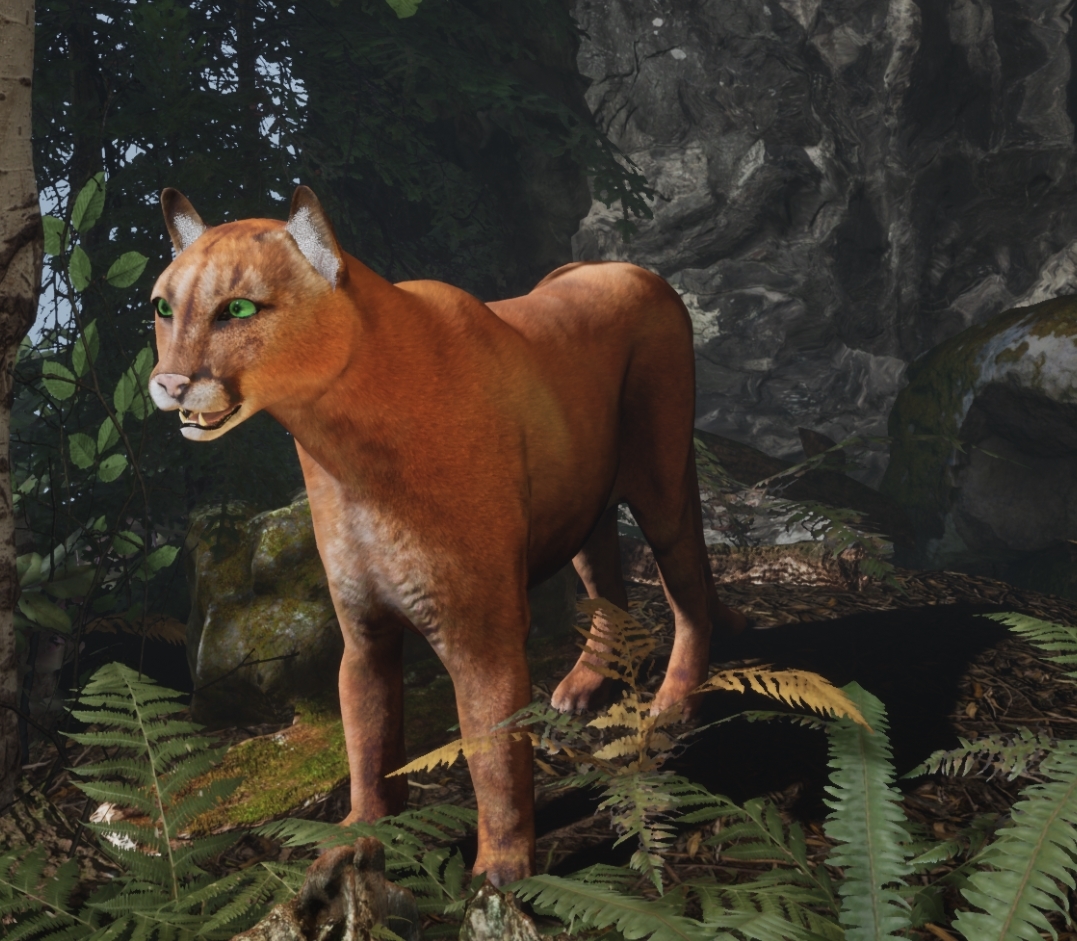
I’m really not. The tools here are doing most of the work. There is some skill in looking at lots of reference to figure out how subtle shapes of the big cat, but beyond that I am just projecting the colors from reference photos – and the great thing about the way your shader works is that the color map can be pretty blotchy and imprecise but it ends up looking really good. So I can very rapidly lay down different colors just by projecting real photos of cougars onto the mesh, and I don’t have to be careful about hiding seams or nothing. Really a pleasure to work this way as I can try out different ideas very rapidly.
How do I default the vertex alpha value?
edit : temporary workaround – I switched the red channel to operate the growth/length functions, and broke the connections to the vertex brush functions as I am not using that. Works as expected now. Is there something unique that needs to be done to use the alpha channel?
In that case just keep using it like that. 
Nothing unique for the alpha channel, you probably just don’t have it selected. Check the vertex painting mode panel for all of the tool options. The fill option is also there.
This looks great. Has it been tested in VR at all?
I’ve been trying to get a nice looking grassy park but so far I can’t get the look I want and keep it above 90 fps in vr with the foliage tool.
I really like your grass examples and hope it works in VR?
Yes, if you’re going for anime style it looks good in VR due to the perceived amount of variation in surface angles, unlike billboard grass. I wouldn’t use it for any extra large surfaces in that case though, unless you were willing to drop the number of samples to keep it fast.
The latest update includes a performance improvement where distant surfaces reduce the number of samples, which should help in that regard. You could also change the material so that it includes extra samples if the user gets very close to the ground.
I’ve been using the shader since today in 4.18 and I have some questions
I’d like to try and control the distribution of the slices so that the slices are closer together the further away from the “bottom” they are, should help the fibres look more like continious fibres. ANy suggestions on what I need to change in the master material for that?
Second thing I’d like to do is change at what distance the shader reduces samples. In it current state the effect is completely invisible at about 2.5 meters distance.
Lastly brush direction. It appears to be controllable with a map with a little editing of the master . There exists such a thing as flow or directional maps for hair. Would there be some way to implement that?
[edit] From what people say on the marketplace comment thread I get the idea that there is something wrong with what was downloaded. I have a grass base material. The rabbit and mink fur are not parented to anything so I parented them to the grass thinking that was the intention, but I also see people talking about a tiger material and there is no such thing in the advanced fur folders.
Going to 4.19 is not an option for me.
That’s an interesting thought. The slices are based on the parallax offset node that comes with UE, so you can edit it in much the same way if you know what you’re doing. I would look into the custom expression driving it and check the iterative loop. From memory there’s a cumulative offset value in there that I already edit to simulate fur direction. Best thing to do is to make a backup of it in a text file and then start editing it and see what happens.
Can you link to an example of a hair flow/directional map? It shouldn’t be too hard to implement. The shader supports a simple vector/normal map for brush direction right now (or vertex colours if you’ve checked that option).
There’s two base material functions: grass and fur. They’re almost identical but grass is a little bit simpler, so if you’re doing fur, use the fur base material. The grass base material on the other hand works better on landscapes than the fur material.
There is definitely a problem with launcher content as recently as 4.18. Is your launcher up to date? My advice there would be to remove the launcher, remove ALL of its saved/vault data and reinstall and download everything again (but don’t touch your UE installs, they’ll be fine). If materials aren’t parented correctly then yeah that might be asset corruption. I’m feeling like I might re-upload it regardless to see if that fixes anything.
This thread over on polycount goexs into the flow maps How to paint flow/anisotropic/comb maps in Photoshop. — polycount.
Veretex paint for direction isn’t really an option for me, it’s not fine enough. I hadn’t noticed you support normal maps and vector maps for brush direction, probably overkill to add another map functionality.
Do you have an example for a vector or normal map driving the fur direction? I’m not entirely sure what a vector map is, is it a vector displacement map?
There is no fur base material. There is a broken fur material function though.
I tried cleaning everything up but there is no difference in the download. I allready did once befor based on the comments on the markplace page. The source on epic’s servers is broken. Try to re-upload. maybe you also need to increase the version number so that peoples launchers realize the source is updated.
Gotcha. A flow map is just a vector/normal map, but in tangent space.
I just checked and it is limited to vertex painting, but there’s a reason behind that. Brushing needs a bit of distance between direction changes to look good.
The single-value brush direction and the vertex brush map are both in object space. The flow map tutorial you linked is mostly a work-around for someone working in tangent space. You don’t need to go to all of that trouble since the shader supports object-space brushing, which lets you use a single value with some slight variance to get a uniform brushing look. Before you go too far, I’d actually try the single-value parameter or the vertex map. Vertex paint maps can be created in photoshop and imported, so you’re not stuck painting in the editor.
I’ve completely edited this post a bunch of times as I worked through the process of remembering how it works, so hopefully I didn’t confuse anyone.
Regarding the rest of your comment, there’s no version number or facility like that. All we can do is provide a file and Epic do the rest. One thing you could try is upgrading your editor to 4.19 or 4.20.
4.19 causes a complete system freeze if I try to apply a material instanced of the fur base to any mesh other then your meshes. as In reboot pc with reset button level of crash. So does 4.15 and 4.16
What does this plugin consider to be a valid mesh? Right now it looks like only a continious model with all it’s uv’s in 1-1 uv space are valid, wich would be bad for me none of my character models are like that.
I really need it to work on 4.18. Upgrading to 4.19 is not a viable option because it means migrating my project. The uassets are right there in the vault after re-re-re-re-downloading them, editor just isn’t loading them.
Migrating the fur asset and dire wolf instance from 4.15 to 4.18 works partially. I can apply it to one of my own meshes without crashing the system. As soon as as I try to apply another one in it’s stead I get the whole system freeze again.