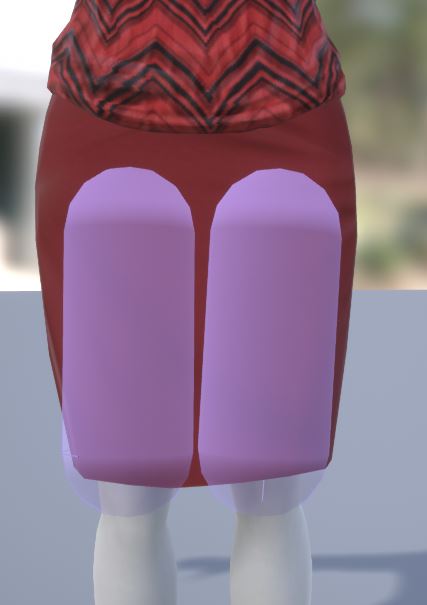
So I’ve successfully set up my cloth simulation on my skeletal mesh but for some reason the cloth isn’t colliding with the physics asset of the mesh. The character in question is a woman in a skirt but her thighs are clipping through the skirt rather than pushing it. Any ideas how to fix this?
Ok for anyone else having this issue I figured out what was going wrong. Firstly, there are multiple places to specify the Physics asset and that got me confused. I was applying the Physics asset under the Asset Details instead of the Cloth tab. For some reason (In 4.18) if I applied the physics asset when I created the cloth it wouldn’t work. Secondly, the skirt was too close to the player’s legs so I scaled up the verts so it’s further away from her body on import and then when the cloth is simulated, it falls in towards her legs and stops.
Sadly this means that you can’t really simulate tight form fitting cloth like a skirt. Granted, maybe it would be better to do tight fitting clothing with traditional skinning.
I’ve found this thread when looking for info regarding cloth simulation on skeletal meshes in UE.
Now, after some updates to the cloth simulation, is something like this a reliable solution? Does the body clip through when simulating physics, or is it fairly accurate? Usually clothes like that are just weighted to skeleton and deform with it, but having a way to actually simulate some cloth parts would be very nice.
In my limited experience Cloth Physics simulation is better for loose-fitting clothing, but it’s not bad for tighter-fitting clothes like this skirt. You just need to tweak the parameters a lot to get the simulation to look just right. I wish there were more presets for different fabric types out of the box so you didn’t have to do so much experimentation.
I’m just hunting around to deal with some cloth collision issue post and myths. The solution which I discovered for tighter fitting cloth collision can be read here at the very bottom of the site in a comment
and here is some useful tutorial that I have discovered
Interesting approach, but I find that what people do wrong most often is paint wrong distance values because the editor offers very poor control.
To that extent, I went ahead and updated my Blender Plugin, BoneBreaker with an NVCloth visualizer.
Generating multiple Vertex Paint channels for things like backstop and animation multiplier makes it possible to replicate most official NVCloth tutorials - however, I find that even with proper vertex paint and the required values the cloth likes to ignore the normal direction imparted by backstop distance/radius.
Most importanty, I think the bigger issue is having to learn how to weight paint the clothing for the cloth to complement an animation rather than fall through the skinned vertex point and penetrate an underlying mesh.
For instance in a tight fitting skit one should weight paint the back to the pelvis so that it can move freely when walking forward, but have the front at a distance of 3 or less, maybe even just 0 for it to follow the leg movement during a walk cycle. An animation multiplier channel can also help on that.
That said, I really wish they would re-worke the system to allow for the capsules to be more than 12, or to provide a way to use SoftBodies like NVCloth suggests…
For anyone who has the same issue (cloth in skeletal mesh not colliding with the mesh’s physics objects) and finds this thread, I finally got it working (UE 5.2.1) after spending an entire day troubleshooting and trying different things, so posting my findings.
The key to solving the issue was this post:
My solution for Blender:
In scene properties set unit scale to 0.01
For Armature and for Mesh set transfrom scale to 100. (key N in viewport)
!!Most important!! Chose Armature and Mesh and apply transform (Ctrl + A)
After that can export to FBX as usual
Basically, I think it comes down to the root bone in your skeleton having scale 1.0, with mesh import scale 1.0
Even if the mesh is the right size in-editor but the root bone scale is non-1, or if you use (for example) 100x import scaling to achieve the right size for the mesh, then collision with physics objects just won’t work for whatever arcane reason (OR the simulation will be completely broken), and there are no in-engine settings or parameters can resolve this.
So basically, make 100% sure that the fbx you export from Blender contains good scaling, and that should fix it.
Literally 0 of the discussion above applies to the engine you are using.
They (epic eggheads) switched from Apex/PhysX/Nvidia to a non working version they aptly named Chaos back in 5.0
In fact, the only change that’s decent out of the whole mess they made which sees you (and everyone else) loose 80% physics performance by using the trash they put out, is the fact that cloth can now interact with anytning - world, other meshes, other phat assets, etc, whitout you needing to go out of your way to make a specific phat collider for the cloth, or essentially re-invent the cloth wheel.
Not sure how people are OK with 80% less performance overall, when the only real change is the cloth collision, but then again people on the forum hardly know what they are doing or work on professional things, so I guess that’s why the complaints over it aren’t just everywhere…
Basically anyone else is still building from source and replacing that trash with physX…