Do I simply attach armor to chest socket? Oo
yes I would like to hear this one
There are a few ways. I would tell here 3 different systems.
The modular pawn approach: taken by games like MonsterHunter(reverse engineering of the assets told me that). Your character is broken in parts, you have arm parts, chest, head, pants, etc. Exactly the same way UT3 player models worked. In UE4, you go and create several skeletal meshes, and then combine all of them into one of them, for example the chest. There is a function that “syncs” the skeletons of all the parts, so you just call the animations in the chest, for example,and they will play fullbody.
The Socketed approach: kinda works if your armour is rigid. Its simpler to do than full modular pawn, and its how Dota2 does player cosmetics. You have a base mesh, of the character, normally naked or similar, and then attach different meshes into those(for example, in Dota, some characters dont have a head in the base mesh, so they can just swap head meshes by attaching a different head into the head socket)
The textured approach: This is how World of Warcraft worked in some cases , old school as hell, but maiby has some used when compared with Tesselation. You make your entere player mesh have a texture, and when you change the colors or cloth, you go and merge the textures into the texture for the master one. This one could be used alongside teselation, but i really dont reccomend it.
For me, the best approach for organic full body armors, is the modular pawn approach. Its a bit of a pain to create assets for it, as each leg, arm, etc, has to be rigged to the same skeleton and you have to check that you make them right. The socketed approach can be useful for parts like helmets or shoulderpads, where they are more rigid and dont need as much animation as a whole arm.
Thanks for so detailed answer, it very helpful!
I think I will mix modular pawn with socketed approach for max effect
Thats the most sane approach, remember you can use the same mesh with different materials too.
Good recommendations vblanco. I rolled all of those approaches for modular entity construction workflow suitable for distributing the Asset production between several artist. I desire to use these methods to also generate a library of prefabs and customizable vehicles, weapons, props, etc. I still think old school modular texture / tint masking technique is relevant today. The challenge is to maintain consistency, but, I believe its possible with some form of Art Guide.
Our approach is to use what we call the Sock.
The sock is the base model that we know that no mater what comes afterward will always work with the animation design as a point of reference with out the need for completed art as well offers the greatest amount of flexibility as to the need for unique design.
On it’s own it is for the most part a completed player model and any additions as to feature iterations is done to this model first as part of the global functionality and any unique design elements adjusted as needed.
in my game (UDK) I used the modular pawn approach, similar to what vblanco described. the difference is that I put the meshes on top based on layers instead of swapping them, and I created them so they would work as layers (like Skyrim). the result is even more variety.
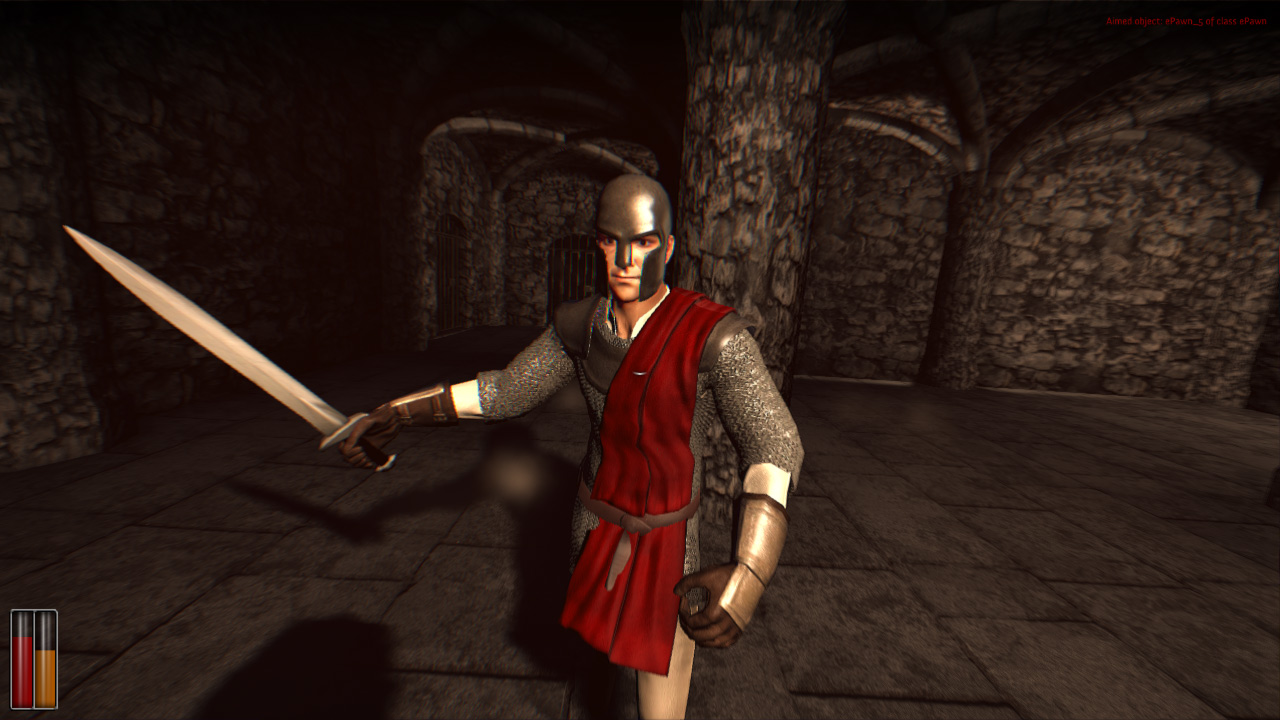
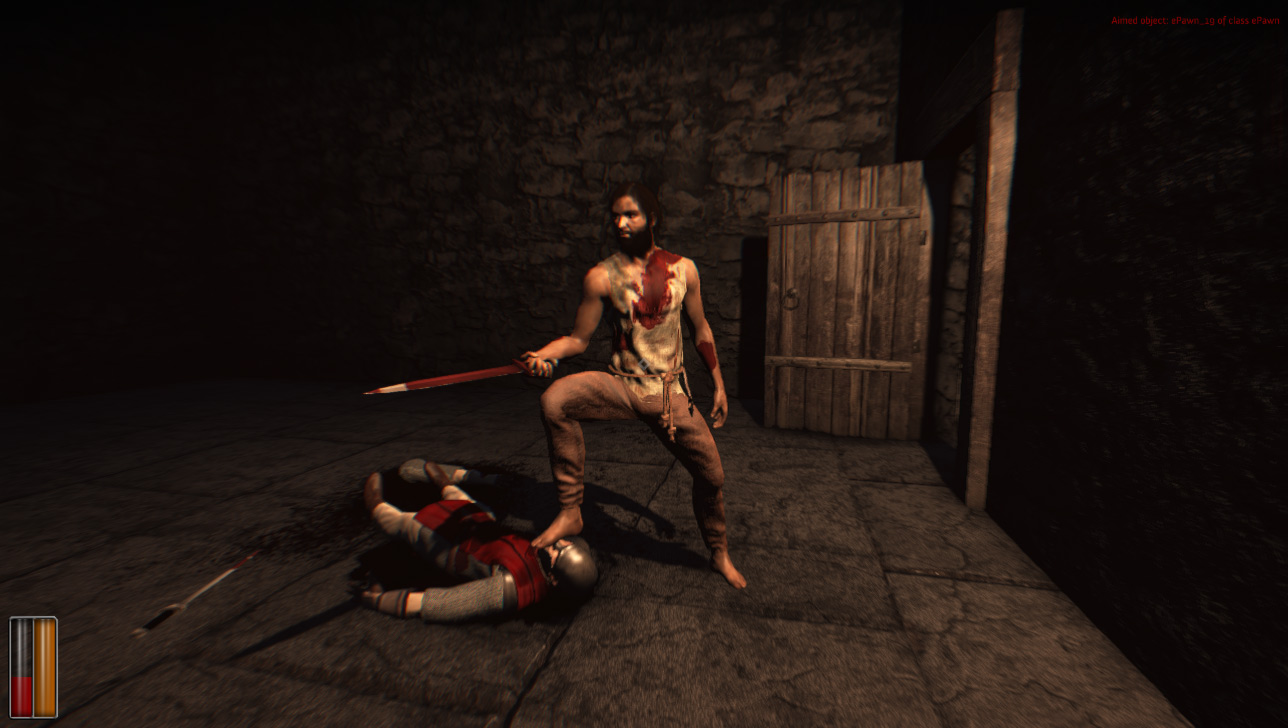
as you can see I’m using the same body mesh, but the cloth/armor varies. the cool thing about it is that the prisoner can wear the chainmail on top of his ragged shirt and it will look different from the guard. same thing if I remove the chainmail, the shirt, the tabard or the shoulder armor from the guard, they will all produce different looks. if you just swap one model for a different one then you cannot have this kind of layered combinations
just for the torso I have the following layers: base body, shirt, chest armor, shoulder armor, and tabard. but some of them overlap with other parts (like the way the shirt goes under the gloves)
the tricky part was making sure an inner layer never comes out through an outer layer, ever, no matter the position in the animation.
for me it was tricky only the first time though. if you setup your rigging/skinning in a certain way you only ever have to do it once (so all I have to do for every new cloth/armor part is to copy/paste the Skin modifier in 3dsmax and it’ll work). if you’re patient enough (like I was) you can make the layers really tight and produce a very natural result (like the guard), but sometimes it requires extra care (like the tabard around the belt, which is still not perfect)
Any more tutorials for UE4?
Good ideas with 3 ways!
Interesting, how expensive is modular pawn for game performance? Is there a way to calculate cost?