Total Animation Newbie: Need some questions answered!

Hello everybody, and thank you for clicking on my thread!

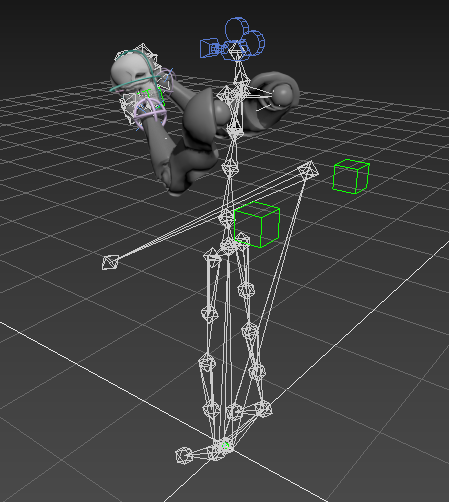
As the title says, I’m a newbie when it comes to animation. For learning purposes I created some animations back then, which worked, but I just skinned my model in 3ds Max and animated each bone by hand - without any controllers at all. And yeah, as professional animators might think, it’s extremely tedious and difficult to do it that way.

The only videos I found that at least showed some of more professional techniques are the videos by MrBrightside, who really creates awesome animations - and I really love him streaming it, providing a lot of insight on how to do it so that it looks good. I think I’d be able to set up controllers like that with a bit of practice, but while watching it and trying stuff out myself back then, I got some questions that I couldn’t find answers for; not everything is 3ds Max (my 3D program of choice) and UE4 related though - some of it is asking about an industry-standard way of doing things.

  1. Does it matter how my hierarchy is set up, even though an animation looks awesome in 3ds Max?
  2. For a more complex animation, would it be possible to add additional controllers and helpers, and would it still be able to be exported correctly on an already existing skeleton that was imported into UE4?
  3. Does an exported FBX-Animation bake the animation to keyframes? I did some animation with Link-Constraints back then, and it acted different in 3ds Max than it did in the UE4.
  4. Do weapon animations include the weapon and the arms in the actual animated mesh? When switching weapons, would it swap out the mesh of the weapon + the arms? Or how would the animating of weapons being handled if I needed to animate pistols for example?
  5. How would first-person animations work when interacting with static objects? Like creating a complete ladder-climbing animation from top to bottom in 3ds Max - the ladder mesh would of course not be a part of the UE4-Mannequins arm mesh. But how can I make sure that the hands are grabbing the correct place like it did in 3ds Max when I tried to drag the ladder into the game and make it climbable with that animation?
  6. How would animations work that include new models? Little example: In Overwatch there is Mei, and she has a little Icey-Drone always as part of her model. But due to the christmas update, there was a new animation added that made this drone fly forwards, and pop out a few snowballs so that it built a snowman. The snowballs wobbled a little bit, so I’d assume that they are animated with bones as well…? Would they have to add these snowballs somewhere invisible to the Mei-Model, or do they just spawn snowball-actors at the correct time and location in the animation?
  7. Do you guys know any other person than MrBrightside who also does awesome First Person animations in 3ds Max like this, but explains his workflow?
  8. To correctly utilize the Camera-Motion that was animated in 3ds Max, is it just a matter of parenting the UE4 Player Camera to the head bone and everything would look the same?

I’d also be willing to pay for a nice recommendable animation tutorial video series for 3ds max, as long as it’s not too expensive!

I know my questions are kind of random, but these are the things I really had trouble finding answers for.
Also, for people who are going to recommend “to read through the Docs”: I best learn when actively using new techniques. If I read about all the different tools for Animating a Biped, when I finished reading the Docs I already forgot what was said on the first few pages. I’m in need of some really good learning material (how I said I’m willing to pay, but I’m learning animation in my free time and can’t afford a course for hundreds of bucks :slight_smile: ) that shows how tools work in exercises, and not just explaining each thing in the greatest detail from top to bottom. I have trouble learning that way.

Thank you very much for reading! And even if you might not be able to answer all these questions, I’d be really happy if you just answered one! :slight_smile:
Also, if you think that my way of learning is not good for topics like this - meh, I might even be able to learn it another way if you have some nice tutorials that you really recommend for that!

Cheers!

  • Crimi

Hello Crimzan, I will try my best to answer :slight_smile:

1 - Any animation is dependant of your hierarchy. So yes, it’s important ! You should also take care of it if you want to use same animation with different skeleton / SKmeshes. I think I don’t get the question…

2 - You can use all the controller you want in 3DSmax. When you export your animation, select only the mesh (if you want or if you animate morph target on the mesh) and the skeleton : that’s the only things you need to export. Every dummy and controller will stay in 3DS max. The only relevant information to UE4 in an animation are the skeleton and the transformations applied to the bones (plus, of course, the morphing tracks if you use them). If you use an IK solver in 3dsmax, it will not be export with your skeleton. The FBX foramt contain only the transformation resulting of its usage in 3ds.

3 - As I say in the question 2, FBX contain only the bones and their transformation. Any other information will be skipped so, your link constrain will not be set in the FBX (UE4 doesn’t know what a link constrain is, anyway ^^) but normally, you should get the resulting bones transformation in the FBX. If your result is different, it’s possible you forget that UE4 deals only with bone rotation by default. If you use some translation or scale on them, you have to tell UE4 to use these transformation in your animation asset.

4 - Ouh… no ^^. Put one mesh, one skelton and one animation per FBX. The hierarchy of your skeleton must stay the same. You willl have an animation for the player, one for the gun. You can prepare these animation together in 3DS but export them separately. You can attach the gun to a socket (attach to a bone) in UE4. Then, play the 2 animation in the same time to have the arm and the gun moving together.

5 - I’s a hard question… Every skeleton in UE4 must have a root bone. All the bones hierarchy have to finally be parenting to this bone. Ideally, you don’t animate it and it is use to move the whole SKmesh. You could use it to align the ladder and the skeletal mesh. Put the root bone at 0.0.0, the pivot of the ladder at 0.0.0 and build your animation. In ue4, if you align the root bone of your SKmesh with the pivot of the ladder, they will be aligned. But you should maybe rethink this. In game, we works with animation loops and move the root of the character to make it move in space. You an do this as you want but your idea to animate the whole climbing in one shot will make your animation not very versatile and you couldn’t climb different sized ladder…

6 - This is a UE4 and BP thing. the drone and the character are to separate object in ue4. You can code something to make the drone follow the character, you can make him do other things… But one things is sure for you, do not animate the drone in the SKmesh of your character. Same thing for the snowballs, you should spawn them by BP while the drone throw them, as you will do with any projectile. The snowman will surely be a third separate object… This is a code question, in deed ^^.

7 - You can find a lot of good stuff by using the “3dsmax rig” “rigging” “advanced rigging” in google. I don’t one to advice for you, find your style and tool (CAT, Biped, other…)

8 - You should have a camera bone (parented to the head if you want…). This way, you can animate the camera bone separately from the head (it’s saffer). In UE4, you will create a socket in this bone and attach the camera to this camera socket.

I don’t have any specific tutorial to give you. Look at different technique and style to choose yours by affinity :slight_smile:
Personaly, I don’t use Biped nor CAT, I learn to rig a long time ago and still using IK and constrain with drawn controllers… I’m a bit old school… But that’s my way to do things. Find yours ^^.

You are totally right, you must practice to learn. It’s no use to just watch video or read doc without doing test in 3ds in the same time.
Animation demand a lot of practice. And don’t focus on the tech ! Animation is an art of observation. learn how a body moves by watching videos of people dancing, running, walking… Look at animation film and see how disney animators are doing this or this… Learn the rythm of a movement.

Observe the nature to imitate it !

I wish you a good learning curve :slight_smile:

Hello JoGoiA, and thank you very much for your answer!

  1. With this first question I was referring to some errors I had back then, where the Animation looked awesome in 3ds max, but was ****ed up extremely in the UE4. I think I made a mistake with trying to export the dummys as well, because they were also shown as additional bones, and that also did interesting things to the physics asset. I think that was the main issue back then I suppose :smiley:
  2. That’s really interesting, thank you very much!
  3. Alright, that makes sense too!
  4. I see! So the pistol not being at 0,0,0 would not be an issue then? I make everything in one scene and then export that stuff seperately. Gotta try that!
  5. I know that this wouldn’t be such a good idea for a ladder, but I just thought about this quick example to further illustrate what I mean with my question! And you answered it, so thanks! :slight_smile:
  6. Alright, that is what I thought. Good to have some confirmation on that.
  7. I googled a lot, I sometimes have the problem that I don’t know if a specific video will answer the questions that I get while watching. But yeah, I’ll continue googling and finding something great!
  8. Oh, parenting a new bone to the head is interesting. I try that out soon!

Alright, you have basically answered all my questions! Most of this is just practice I suppose :smiley:

Thank you once again for your answer, you have been really helpful!

  • Crimi

1 - During the export from 3ds, you should select only your skeleton and the skinned mesh (and export selected only). Any dummy you select and export will be consider as a bone in the final FBX and can mess up your skeleton.

2, 3 - Cool ! I’m happy my poor english made sense to you :slight_smile:

4 - To simplify your work, I suggest you to put the the part of your gun that is handled by the character at 0.0.0 before exporting it. This way, it will be easier to set his location in the hand of the character. If not, you will have to apply an offset to place it right. The 0.0.0 point of your gun will be at the socket coordinates by default.

5, 6 - perfect ^^

7 - That’s how you learn :slight_smile: By looking at an unexpected video, you could find unexpected ideas ^^.

8 - I personally prefer to parent the camera bone to the root. If you move the camera bone linked to the head bone, you will have some problem if you change the head animation… If your camera bone is parented to the root, you can alter each animation without messing up with the other bones. But of course, it will works fine anyway :slight_smile:

I’m happy to help ^^.
I wish you a smooth learning curve :slight_smile:

Thank you very much! And I understood your English pretty good! :slight_smile:

I want the camera to be connected to the head bone because I want the player’s camera to move slightly when reloading a weapon, or climbing up somewhere, to give that extra feel of realism to head movement. That wouldn’t work if I parented the camera to the root, right?

Of course it will… if you animate the bone :slight_smile:
If you just want the camera to follow the head, attach it to the head bone ^^. The idea behind the “cameraBone” is to animate it separately from the head.
In real life, your eyes always compensate your head movement by looking in the opposite direction (or by preceding the movement).
A human head weight a lot and has a great inertia… Your eyes don’t ^^

404143553e2ffdf50983d055103cb262c949be99.jpeg
(this guy has an asymmetry problem, he probably see double ^^)

If you attach the camera directly to the head, the movement of the camera will be unnatural. That’s why you should animate the eye direction (the camera) in a different way than your head.
But of course, if you animate a first person something, you don’t have to bother with the head and this is a lost of time :slight_smile:

Sorry for not responding so long, RL got me hard. :smiley:
I have no further questions, I just needed to say thank you very much for all your detailed answers!

I’ll be sure I have this thread bookmarked, so that I can refer to your answers when I have a similar issue to tackle :slight_smile:

Okey, I tried something out!
The Animation I made with the following rig worked nicely, but I want to know if it is possible to add helpers later to aid me in future animations for this object, without having to re-create all animations with the new hierarchy.

Please take a look at this picture:

https://i.gyazo.com/b59b08f664a2c0b9eedc8775e9f53d72.png

I imported this skull 3D Model and tried to play with it a little, learning about Hierarchy, and what should be selected and what not.
Green Dummies = The bones for the Jaw and the Skull itself (I used Dummies instead of bones to learn that those also can be interpreted as “Bones”)
**Red Spline Around Skull **= Easy to select and animate the whole skull
Yellow Spline = To easily animate jaw opening and closing.
(Not visible in the picture: A dummy at 0,0,0 that is the top of the Hierarchy)

This is how the hierarchy looks like:

https://i.gyazo.com/3a4bdb5aea9766b29c3d4aa48b372f63.png

My question is:
Is it possible to exclude Helper_Skull and Helper_Skull_Jaw from the Hierarchy, without sacrificing it’s contribution to the ease of animation?
Imagine I created ten animations for this skull already, and now I wanted to create an animation, where it’s jaw is hanging just on one point on the skull. I would create a Point helper, move it to this point where the jaw is hanging, parent the Skull_Jaw to this very point, so that I can create a realistic hanging animation because the pivot of the point is very conviniently placed. But I just want the Skull_Jaw and Skull_Head bones to animate according to my changes in 3DS Max, and not change the whole Hierarchy in the rig.

How would you tackle this? Would I have to plan all animations beforehand to avoid the need of re-targeting or creating a new, updated rig with the new animation helpers? So that I have one rig, with all the necessary objects available? Would using Link-Constraints help instead? I don’t know about all the available controllers in 3ds Max.

That’s what I understood was possible when you said…

… because I thought the animation gets “baked” to the Skull_Head and Skull_Jaw bones.

I was able to use HI Solvers on the Mannequin-Arm Mesh and it exported nicely. I just selected the Bones, and not the HI-Solvers, and it looked perfect in UE4. When I do the same with the Skull, those Splines that I made, that should just help me in animating, end up in the hierarchy as well (which might make sense) :smiley:

Please forgive me for this wall-of-text and maybe the noobish questions. I try my best understanding all this! D:

Hello Crimzan ^^

Before answering this, I have to say that you shouldn’t use point or helper as bones for your skeletal mesh :slight_smile:
FBX can use helper as bones at export time but they are missing some usefull properties that are normally in a bone (eg : scale…)
You can do what you want but I advice you to place your bones in your skeletal mesh once for all. But bone translation is dealed by FBX :slight_smile:
But, you have to know that if you change the way the vertices of your mesh are skinned to your bones, you’ll need to reeimport the mesh and the skeletal as a whole new skeletal mesh… It’s not how we are usually do this ^^.

Keep in mind that what happen in 3ds max stay in 3ds max :slight_smile:
The only things that are exported are : The mesh, the bones, the rotation/position/scale of each bone in time (skeletal animation) et the morph target (don’t bother with that now ^^)
That’s why you can make any rig you want in 3ds, finally, in UE4, you will have :

  • a skeletal mesh (that contain the mesh and the skin information (the way the vertices are linked to each bone)
  • a skeleton (that contain no mesh but when you import an animation, it will apply to a specific skeleton.

If you change the location of a bone without creating/importing the new skeleton, the future animation will apply to the ancient skeleton and the bone you moved will not had move in the old skeleton… But if you move a bone in an animation, the bone translation will apply to the skeleton.
To make it short : if you change the skin info in your SK, you will need to reimport it / have a second SK.
If you move a bone without change the way it influence the vertices position, you’re good to go :slight_smile:

In deed, you have to think about your skeleton ^^. The skeleton you rig to your SK have to be afficient enough for ll what you’ll wan to do with it :slight_smile:
You can use and change any constraint you want in 3ds as the resulting movement of bone only will be export. The rig you build in 3ds will help you to animate the bone as you want but finally, only the bones are exported.

That’s totally normal :slight_smile:
You export the bones and theire movement in space, not the rig you use to make them move :slight_smile:
To export an animation from 3ds, select the skeleton only and the mesh (if you need it) and use “export selected”. If you include helpers/spline/IK solver in your export, they will be consider as bones or meshes and will modify the hierarchy of your skeleton (by adding false bones to it) and UE4 will be lost…

Hey JoGoiA!

Thank you once again for your answer!
I did not want to change the skinned vertices in any way, but I understand the benifit of using actual bones as bones instead of helpers! I know I can do what I want, and that is exactly why I appreciate every single advice that you give me! :slight_smile:

Basically, I have to plan my rig accordingly, and I can add every controller I want before I create any animation, so that everything is set.
Then I create my animations, and export the Bones (+ the mesh, if needed) only, without selecting any helpers, by using the “Export Selected” feature.
If I need to create additional helpers in the animation, I have to make sure I don’t alter the Hierarchy, so that every bone is the same and everything works as it should. But it should never get that far because I planned my rig accordingly :stuck_out_tongue_winking_eye:
And then, I export every object separately, if I used multiple objects like the Mannequin Arms and the Skull in one scene.

Alright.
Thank you so much.
One day I’ll buy you a beer! :smiley:

  • Crimzan

That’s exactly the process we call “rigging” :slight_smile:
In deed, if you set a natural and well thinked (?) skeleton for a mesh, you will have no trouble to animate it ^^.
The limitation of a skeleton sets the limitation in animation.
After all, you can’t bend your arm at any angle… Your own arm has constraint (normally ^^).

Yep and yep :slight_smile:

In fact, you can have several rig for the same skeleton if you want.
You also can modify a rig for a specific animation.
I did it when needed by adding rotating controlers in my rig to make turn over animation and wish to substract the rotation of the root after finishing an animation… But don’t worry with that now :slight_smile:

If you have several elements that share the same skeleton, you can export them together in one FBX.
But if you want to put an animated gun in the hand of a guy, the gun has his own skeleton and must be exported separately and attach to the main skeleton through sockets :slight_smile:

I’m french… But I will drink one at your success :slight_smile:

Hello again!

Thank you for your previous answer! I think I understood the main animation parts now! :slight_smile:
I played around some more, to now learn about getting everything into UE4. I also have some additional questions! :slight_smile:
I got my animation finished. I made it like this:

When you look through the camera, you can see this first-person view of the hands and you can also see that the hands perfectly touch the skull.
The root for the skull is at (0,0,0), but the skull bones itself are aligned so that they perfectly fit into the hands.

I exported it like that, and just positioned the skeletal Mesh at 0,0,0 in the UE4. When playing the animation, it looks perfect!
But I did not work with sockets, at all. I can’t imagine how I would work with sockets like that. When I create a socket for an object in the hand with that bone, how can I make sure that the Skull fits like that exactly how it did there?
And if I don’t use sockets, I can’t really use things like weapon-sway or something like that, right? I dunno.

Also, when preparing animations, do you create a max-file per animation? Like one max file for Idle, or running, one Max file for Equipping the skull, or do you just have one single max file and export the ranges?

And if I have different weapons, like this skull, maybe a knife. How would you use Blueprints to switch between weapons? I read that switching between different animation Blueprints (if I created an animation blueprint for each weapon) will cause a sudden popping. Does it matter if I want to make a first person animation, though?
Also, I found this thread:
https://forums.unrealengine.com/deve…713#post399713, and post no. 6 seems to be a neat way to tackle it, without having to use multiple Animation Blueprints. But I dunno if this is not too complex for me in the beginning stages. And when I switch the weapon, I’d just have to switch the skeletal Mesh in my Skeletal Mesh component of my First Person character, right?

To re-cap:

  1. You see my scene. How do I need to export the Skull animation so that it fits perfectly if I attached it to a socket? (I suppose putting the root of the skull to 0,0,0 in my max scene is wrong, and needs to be linked to a bone like hand_r?)
  2. Do I need to place the socket in the UE4 by Trial and Error, to make sure, that it fits perfectly?
  3. Should I seperate each animation in a max file, or should I put all animations for that object into one max file and export only the specific ranges?
  4. How would I switch weapons?

I start to feel bad for all these kinds of questions XD Most of the things I find only tackle a part of the problem or questions that I have :confused:
Anyway, thank you (or anybody else!) for answering in advance :slight_smile:

  • Crimi

You’re right ^^ When you use sockets, the skull will attached to one bone (in most of case, the bone of the hand). So is you want to have the end of the fingers touching the skull precisely, it can be easier to be like you did (animating in 3ds and align the 2 skeletons). Socket main purpose is to manage the weapon in hands in a game context… If you want to achieve better result, you can work without them :slight_smile:

But you can use hand socket too, of course. You’ll have to set the 0,0,0 of the skull to the socket position. and animate the fingers cansequently… At this stage, you are the animator and you make things as you like :slight_smile:

I do, in deed :slight_smile:
I never succeed at using the range system in FBX export…

You should start another post in the BP section of this forum for this :slight_smile:
The animBP is set in the actor BP, if you switch your weapon, you’ll switch the anim BP too.

You can move the socket relatively to its parent bone in UE4 (in the skeleton view). So, you can attach a place holder to it and move the socket until you’re satisfied ^^.

Pfiou ! I think that you get the basis, now :slight_smile:
Don’t forget that there’s no better way to do these thing (there’are, in fact… but You have to make your choices).
You’re an artist now, make things the way you want ^^