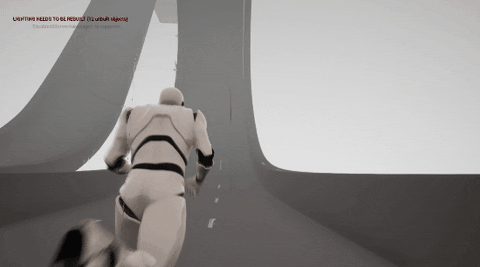
I present you a Code Plugin for UE4, inspired by Epic’s ArchVisCharacter. Contains six C++ classes, and an example map with blueprints. This plugin provides a Character, a third-person camera, a PhysicsVolume, and a Projectile that support any gravity direction determined by ten different modes.
This project started (2014) as a CharacterMovementComponent subclass with support for arbitrary orientations. After Epic’s explicit interest on integrating this in the base engine, it evolved in a series of GitHub pull requests that improved the base CharacterMovementComponent, but never got any gravity-related improvements in.
This plugin completely supersedes other plugins that use my outdated and unpolished code that I shared with everyone for older versions of Unreal Engine.
Unsupported features include AI with navigation mesh based walking, and cloth geometry simulation.
Only the last version of Unreal Engine receives plugin updates.
Features:
Character with support for any orientation and gravity direction.
PlayerCameraManager that handles any arbitrary Character orientation.
PhysicsVolume that overrides gravity direction for overlapping Actors.
Projectile that follows gravity direction.
10 modes that determine direction of gravity, zero gravity supported too.
Make sure you already have created a game project.
Player controls are only handled by the example Character Blueprint, and require input bindings.
Open the example level to learn how to use the new classes added by the plugin.
Install the plugin to the engine.
a. Open Epic Games launcher
b. Click on “Unreal Engine” section
c. Click on “Library” tab
d. Under “Vault” sub-section, search for “Ninja Character Plugin”
e. Click “Install to Engine”
f. Choose engine version and wait for installation
Enable the plugin in your game project.
a. Open project with editor
b. Edit > Plugins
c. Search for “Ninja Character”
d. Mark “Enabled” checkbox
e. Restart editor
In Content Browser, mark “Show Engine Content” and “Show Plugin Content” checkboxes in “View Options”
Add new input bindings (optional).
a. Outside the editor, go to your project’s root folder
b. Open “Config” folder
c. Backup “DefaultInput.ini” file (if it exists)
d. In the editor, Edit > Project Settings
e. Click on “Input” section below big “Engine” word
f. Under “Bindings” sub-section:
Add “Jump” to “Action Mappings”, assign a key/button
Add “MoveForward” to “Axis Mappings”, assign keys or joystick axis
Add “MoveRight” to “Axis Mappings”, assign keys or joystick axis
Add “Turn” to “Axis Mappings”, assign mouse axis
Add “LookUp” to “Axis Mappings”, assign mouse axis
Add “TurnRate” to “Axis Mappings”, assign joystick axis
Add “LookUpRate” to “Axis Mappings”, assign joystick axis
Open the example level (optional).
a. In Content Browser, choose the “NinjaCharacter Content” path/folder
b. NinjaCharacter > Maps
c. Double click on “NinjaCharacterExampleMap”
d. Play the level (input bindings required), or simulate the level (ALT+S)
Open any level of your game project.
If you DON’T have your own Character Blueprint:
a. In Content Browser, choose the “NinjaCharacter Content” path/folder
b. NinjaCharacter > Blueprints
c. Right click on “NinjaPlayerCharacter_BP”
d. Asset Actions > Migrate…
e. Click on “OK” button
f. Choose your project’s Content folder
If you have your own Character Blueprint:
a. In Content Browser, search your own Character Blueprint
b. Open it
c. File > Reparent Blueprint
d. Choose “NinjaCharacter”
e. In Content Browser, choose the “NinjaCharacter Content” path/folder
f. NinjaCharacter > Blueprints
g. Double click on “NinjaPlayerCharacter_BP”
h. Click on “Event Graph” tab
i. Copy nodes and connections you need (for player input) to your own Character Blueprint
j. In “Components” panel, select “NinjaPlayerCharacter_BP(self)”
k. Copy the changed settings you need to your own Character Blueprint
l. In “Components” panel, select “CharacterMovement (Inherited)”
m. Copy the changed settings you need to your own Character Blueprint
If you DON’T have your own PlayerController Blueprint:
a. In Content Browser, click on “Add New” button
b. Select “Blueprint Class”
c. Click on “Player Controller” button
d. Name it, open it
e. Change the “Player Camera Manager Class” setting to “NinjaPlayerCameraManager”
If you have your own PlayerController Blueprint:
a. In Content Browser, search your own PlayerController Blueprint
b. Open it
c. Change the “Player Camera Manager Class” setting to “NinjaPlayerCameraManager”
If you DON’T have your own GameModeBase Blueprint:
a. In Content Browser, click on “Add New” button
b. Select “Blueprint Class”
c. Click on “Game Mode Base” button
d. Name it, open it
e. Change the “Player Controller Class” setting to the PlayerController Blueprint
f. Change the “Default Pawn Class” setting to the Character Blueprint
If you have your own GameModeBase Blueprint:
a. In Content Browser, search your own GameModeBase Blueprint
b. Open it
c. Verify the “Player Controller Class” setting uses your own PlayerController Blueprint
d. Verify the “Default Pawn Class” setting uses your own Character Blueprint
In your level, Window > World Settings
In “World Settings” panel, change the “GameMode Override” setting to your own GameModeBase Blueprint
just wondering, the align character to floor really needs a lerp or something to smooth it out, at the moment it appears to be stuttering due to suddenly changing angle to match face below z axis.
Change over time from current angle under z axis to new z axis angle factoring in movement speed.
I’ll have a play later, see if I can put something in, but currently between teeth extraction appointments so can’t think straight at the moment, 2020
It’s something that never bothered me… smoothing the collision capsule orientation is troublesome for character movement… it’s difficult to explain if you don’t test it… movement becomes “unreliable”.
I always thought that it’s better to smooth the skeletal mesh orientation, or use really smooth floor geometry.
Thats really cool, wish Epic could add more flexible solutions like these natively so we didn’t have to find a hacky solution. Why hasn’t epic merged it into unreal engine yet? I could see this behavior be very desirable for alot of stylized projects? More flexibility and exposed elements would be great in future! Thanks again
before buying I want to know whether I can use this in a game or not. I’d like to use it as a ability for a limited amount of time and that time run out player falls down and becomes becomes human
Nope, Epic has no plans to merge this into Unreal Engine that I know, it’s a feature that needs to be flawless, adds costs to maintenance, code logic is more complex, etc. You’re welcome!
Yeah, you should be able to turn on/off each configurable checkbox through blueprints, let me know if you think there is something missing. BTW, the plugin is FREE.
Huge performance impact? It depends on how much processing time you can spend on character movement, which is rather heavy. How many ninja characters do you have in your game?
It’s better to avoid smoothing the invisible capsule orientation and smooth the visible stuff (skeletal & camera); or make the capsule smooth with more complex logic that involves recalculation of floor-normal/capsule-axis, avoiding time-based logic.
What’s the size of the planet sphere you have? (To test with)
Hi
We actually don’t want to put a firm number on the amount of players (yet). That’ll mostly depend on overall performance we get, but we’re hoping to get in the range of 16-24 (online multiplayer).
I wasn’t really a big fan of the time-based lerp myself, as posted above. Didn’t think of smoothing the mesh/camera in stead of the capsule, that’s a good idea, thanks! I rather avoid the capsule axis/floor calculations then, since I guess that’s the biggest hit on performance.
The world we currently use is 170 units in diameter, which isn’t awfully big, yet big enough to make the gravity rotation noticeable.
Two things I noticed that may be a bit of an issue for me.
Firstly it doesn’t appear to work with aimoffsets as the character is usually looking in the wrong direction when upside down or sideways and such.
Secondly it doesn’t appear to work properly at higher speeds. When I upped the speed of the rotating platforms for instance and added multiple directions the character goes flying off. I’m intending to use this for spaceships that can move while the character is inside so it creates a bit of trouble.
Any ideas for how to solve these issues? I’d greatly appreciate any advice.
We’ve ran into an issue when packaging our build for Android.
NinjaPhysicsVolume.h(28) : LogCompile: Error: An explicit Category specifier is required for any property exposed to the editor or Blueprints in an Engine module.
NinjaPhysicsVolumeSpline.h(26) : LogCompile: Error: An explicit Category specifier is required for any property exposed to the editor or Blueprints in an Engine module.
What adjustments would you suggest to complete the packaging process? This is our only issue with the packaging process for our title. We don’t want to make an drastic changes as this was a last minute addition as we are still learning more and more about the plugin.
I never used AimOffset myself, is there any Epic example project that uses it?
I will try to reproduce the platform issue and see if a solution comes to mind.
.
Leaving the reply here for others:
Just add ,Category=“NinjaPhysicsVolume” to the lines the packager is mentioning (subtract 1 to each number), it will work.
We’re also using camera offsets, but (so far) didnt notice a problem. Are you using the ninja camera manager in the controller? I forgot that once myself, and caused some issues with gimbal locks and weir rotations.
the gravity updates after the delta between old and new gravity directions gets exceeded. I can imagine if the physics get calculated while that delta isnt exceeded, it could cause physics to misbehave. Could try attaching the player to the ship, so it becomes a child object. although not sure if that causes other issues
I truly love your plugin, thanks for putting it free on the marketplace!
I have a little issue with my camera and i don’t know how to fix it (i’m a bit of a newbie in BP and C++ so, sorry if it’s an easy one to fix :o )
It seems that the camera rotates at 90° after the character has climbed a specific angle
If you have any idea how to solve this problem i’d be very glad!
“To start using a Ninja in your game project, create a Blueprint Class and choose NinjaCharacter as parent class, copy the Event Graph and Variables from the NinjaPlayerCharacter_BP Blueprint example, configure more settings, and assign it as your “Default Pawn Class” in your level. …] The camera that follows the Ninja rotates correctly thanks to the Ninja PlayerCameraManager that I assigned as the “Player Camera Manager Class” in the PlayerController Blueprint (which is used by the GameMode Blueprint set in this level).”
Hello Tartopute, did you also create a PlayerController blueprint that uses a NinjaPlayerCameraManager?
I can’t find any of the content? I’ve definitely installed it to the engine, and I’ve also enabled it in the project. But I only see the default 3rd Person Character Map and that’s it, nothing else. Any advice?