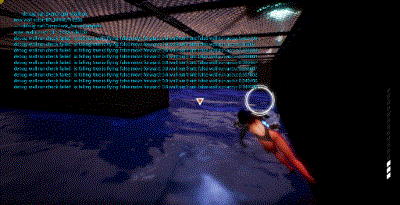
A glimpse of combat in 《Drifting》
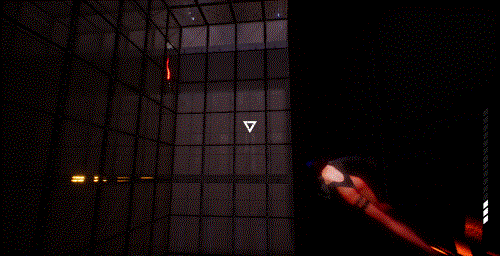
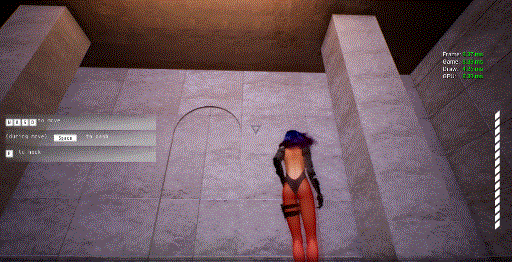
Tutorial Ghost
https://media.indiedb.com/cache/images/games/1/70/69632/thumb_620x2000/tutorial_ghost_500x257.gif
Not until I attended the first play-test session last year did I realize, that a steep learning curve to my game might prevent gamer from fully enjoying it. Since then, I spent a considerable amount of time restructure and improve the tutorial section of 《Drifting》 according to a worklist composed, filtered and prioritized from feedbacks I received from each play-test session (see part 1 and part 2 of my previous articles for more detail).
The tuning process is long and cumbersome, in the past 6 months, I’ve added UI component specifically for the tutorial; embed extra tutorial logic into my already-over-complex animation and gameplay system; the level streaming method and respawn system also has to cater to the quirky nature of the tutorial section. Adding these specific, one-time features brought a lot of struggle and self-doubt to myself as a programmer, knowing nearly 90% of the work I’ve done cannot be re-used in some way past the first 15 or 20 minutes of the game.
[ATTACH=JSON]{“alt”:“Tutorial Ghost”,“data-align”:“none”,“data-size”:“full”,“data-tempid”:“temp_185348_1583562037949_567”,“title”:“Tutorial Ghost”}[/ATTACH]
Making a tutorial ghost is a suggestion I received from a play-testers a few months ago. I’ve added the suggestion into my working list, nevertheless, I was tired of doing those one-time tasks and decided I could achieve a similar result by using video clips instead. I cut myself some slack and done just that. A week later, I noticed the size of my packaged game gains an extra 400mb because of the amount of tutorial videos referenced in the map. Not only is the sheer size of video clips is an issue, but as I adjust existing animations, lightings and tutorial sections, all the previously made videos need to be re-recorded - the last straw that made me resort to the tutorial ghost method.
In the past week, I’ve spent some time to make a new actor class and animation blueprint to mimic the behavior of the player character. The idea is to enable the ghost to perform all the moves the players are able to do within a pre-determined path. Although the tutorial ghost system is still under development, I am pleased to see this newly added makes the tutorial section much more lively and interactive.
I hope you enjoy this week’s update, feel free to share your thought and post a comment on this matter, have a wonderful weekend! (・∀・)/