Hi everyone,
EDIT: We are in week 3 but I wanted to catch up fast posting this. I will be posting updates every monday.
I enrolled this term for CGMA course: Organic World Building in UE4 with Anthonny Vaccaro (https://www.artstation.com/autocon) as the instructor. So far it’s been an awesome experience and I’m in the third week. I’m documenting my process in my Artstation blog but I figured out I can share it here too:
I wanted to take some minutes to document my process and share with you my experience with the class because so far it’s been amazing and I feel it is worth sharing! I will try to put my biggest takeaways on the course since I feel those are the “Aha!” moments we are all looking for and they really worked for me.
The course is heavily focused on organic world building (yeah, I know), but unlike any other course, this is really about BUILDING a world. A world that actually works in a game production environment and while learning the workflows to be able to decorate a big world. Of course we don’t have enough time to create an MMO or something like that so instead, we are focusing on creating a small portion of our game environment by doing a vertical slice that has most of the assets we will be using and can be easily be placed in the rest of the level if we intend to create a larger world.
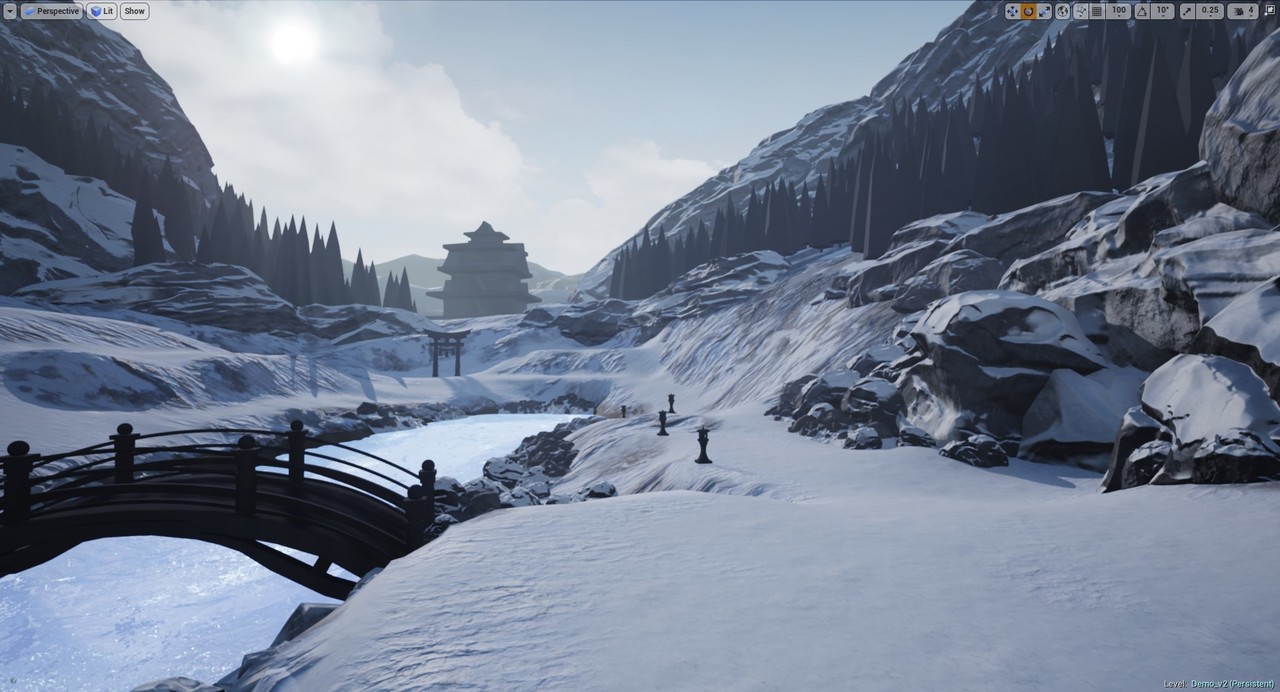
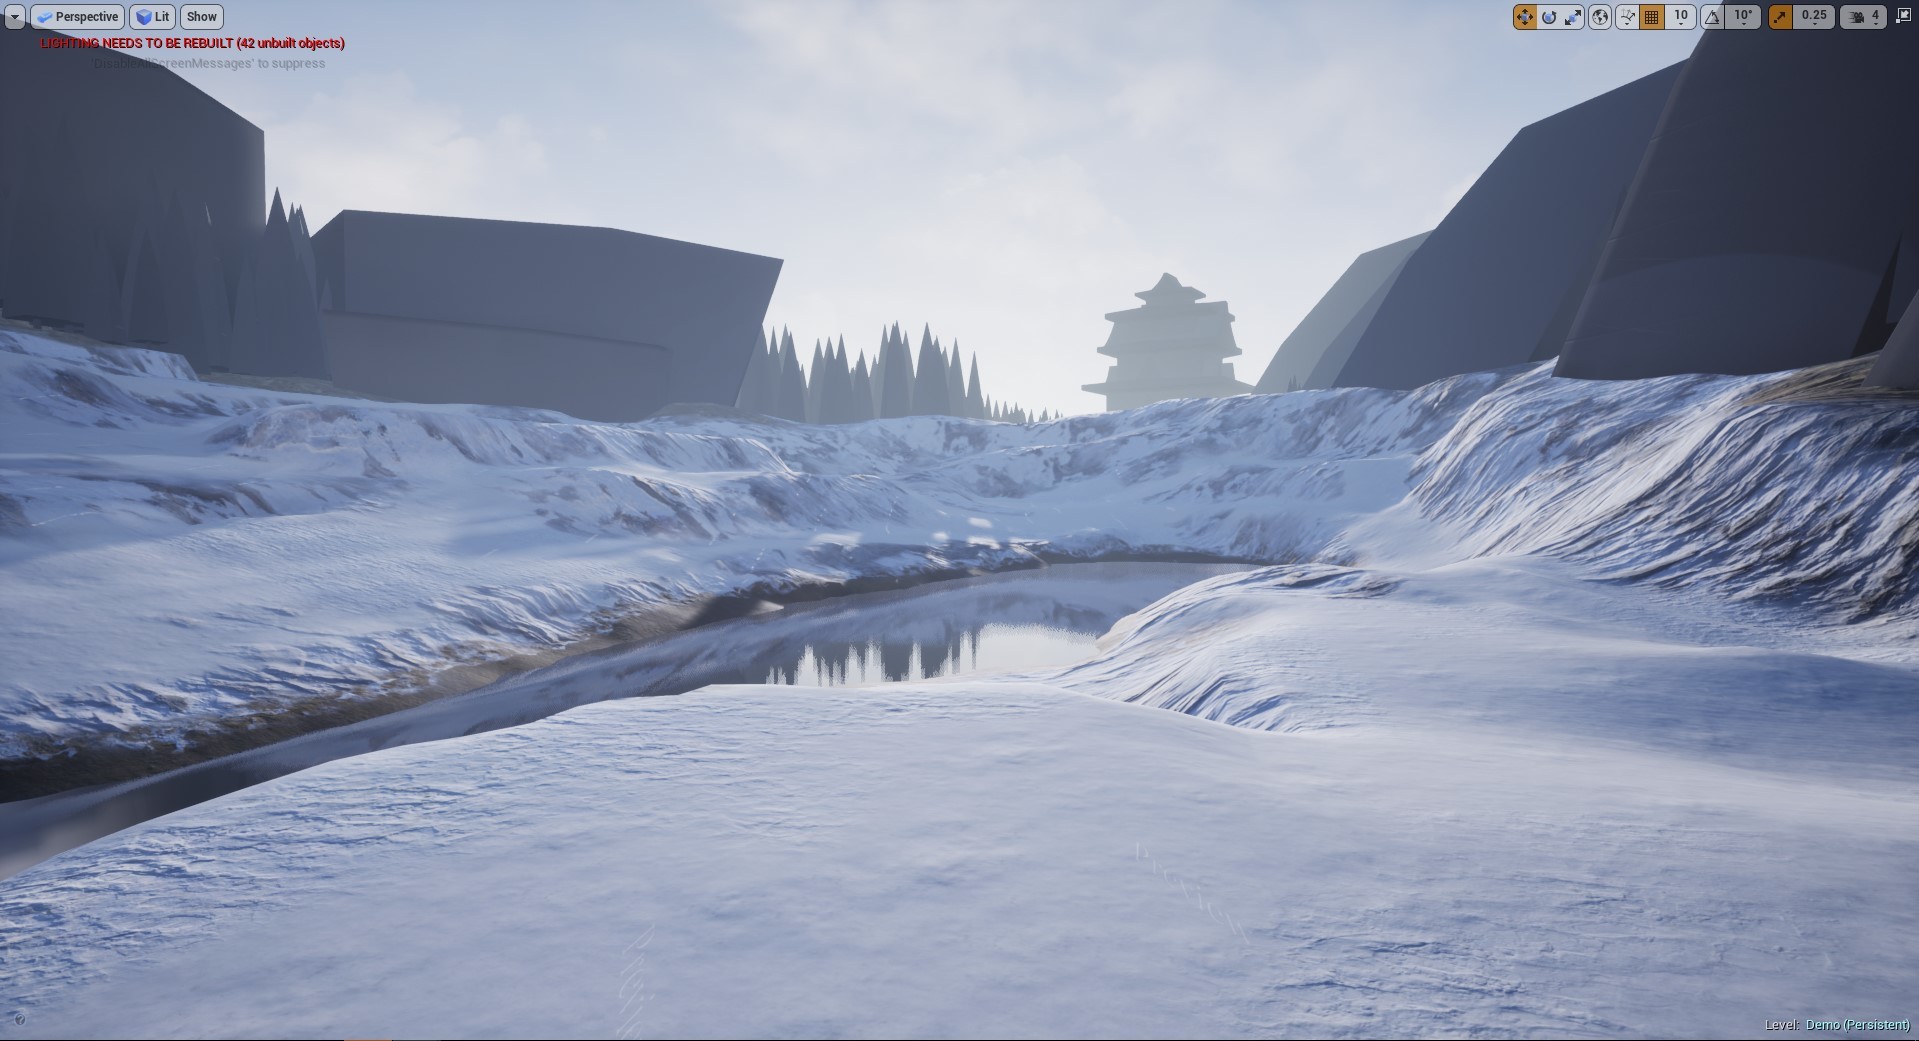
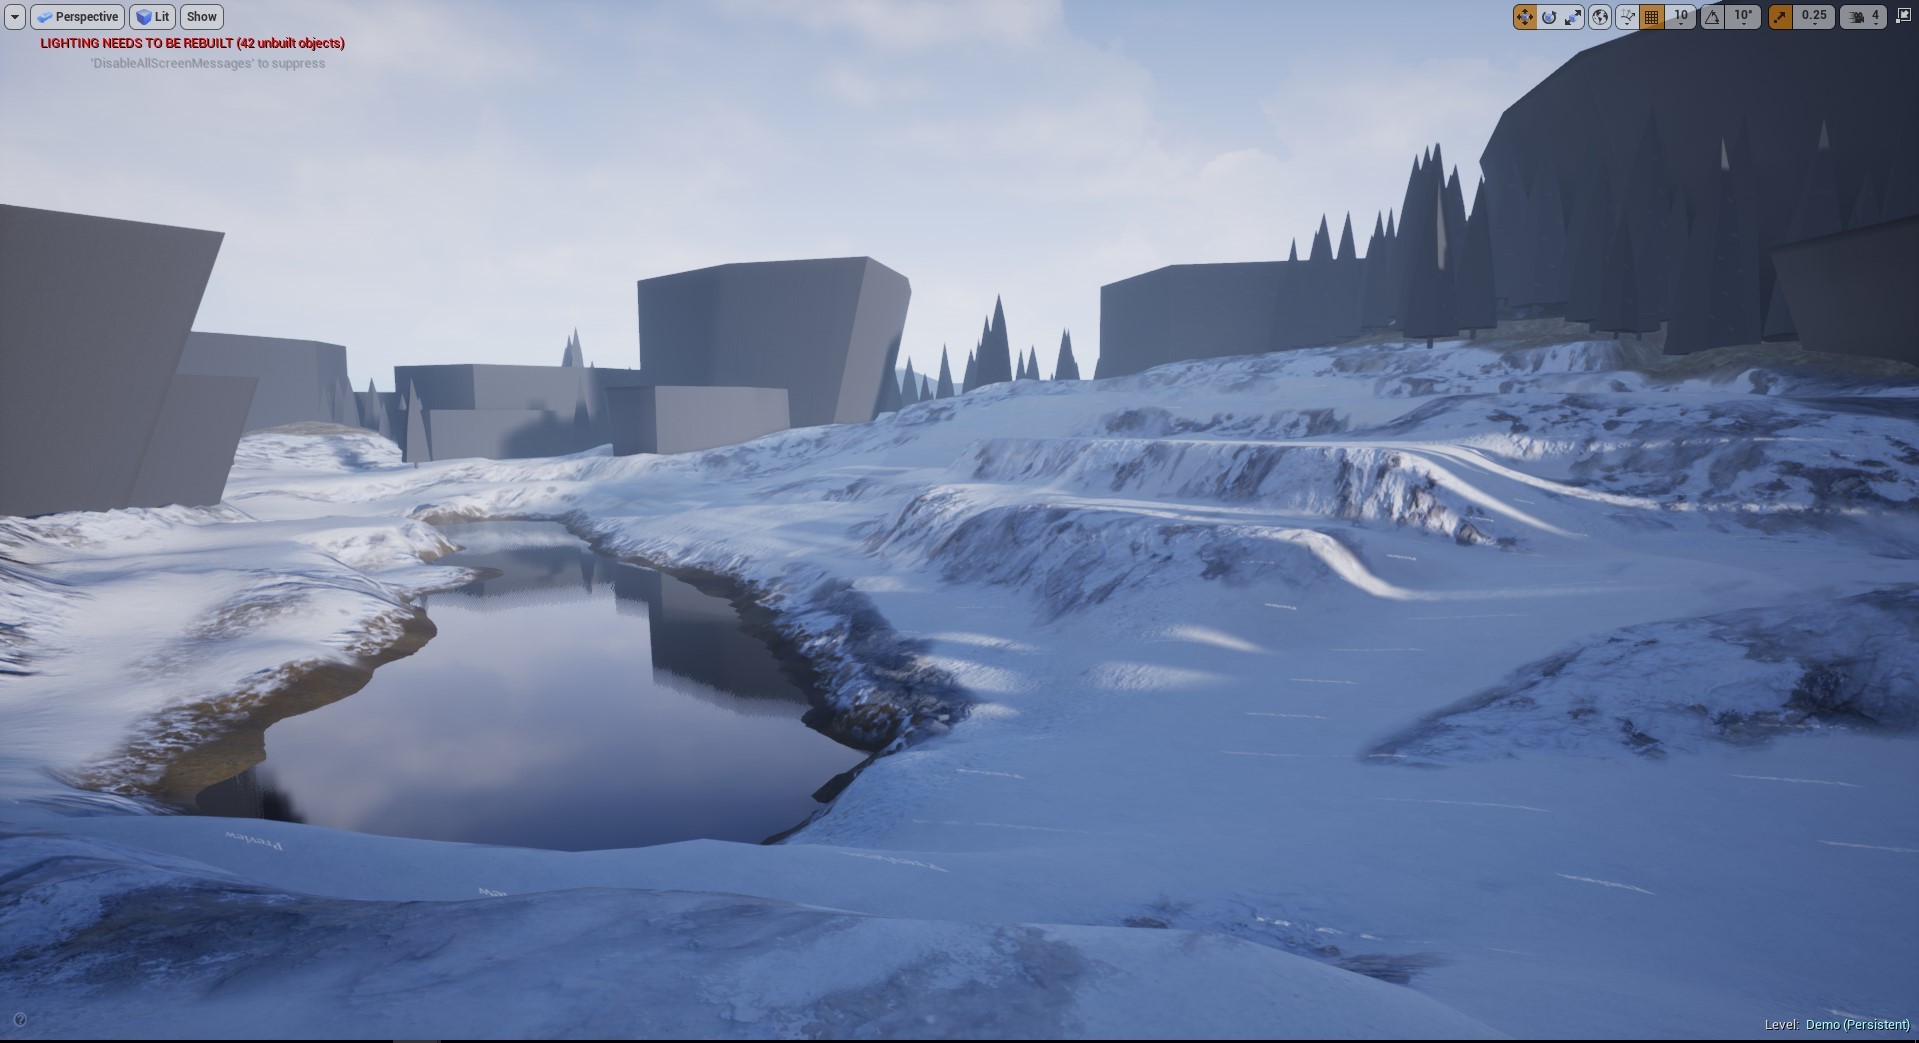
I’m working on a snow environment with some Chinese elements on it. The AS challenge will end much earlier so I decided I would just focus on pushing this piece a little bit more and don’t join this time. Also, since I want to get the most out of the course, I may not have enough time to model man-made elements since I want to focus on the organic stuff.
This is what I’ve got so far in these 2 weeks:
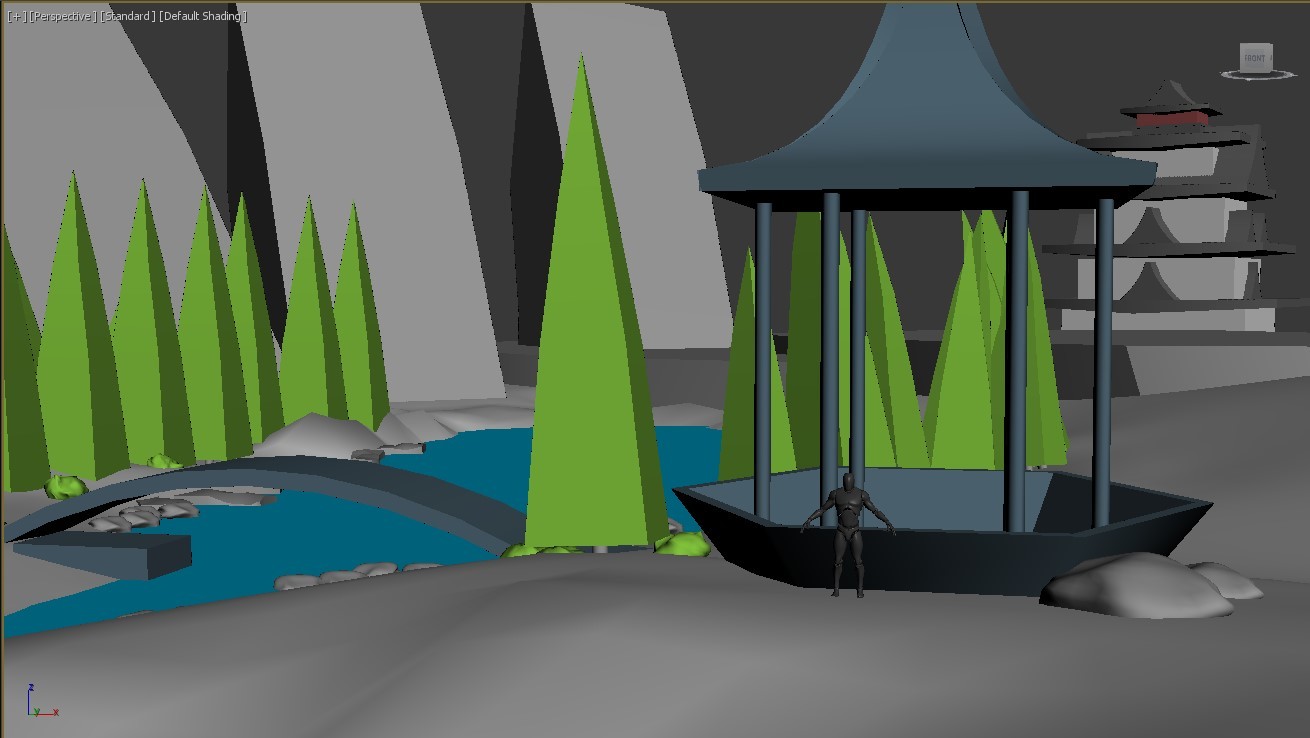
On week 1 we started creating our blockout in a 3d modeling package, I was a little bit skeptical about this process since I didn’t see the point of doing it and then redo it in Unreal with the Landscape tool. I must say, I will do this again for the next Environment I’ll work on.

So, how did making a blockout in another program helped me to create the environment in Unreal? Especially if it looks a little different than intended?
First, we need to create a small asset list that we will use for our project after we checked our reference. We learn to break down the reference in Primary, Secondary and Tertiary elements. Having those 3 is really important to create a nice rhythm and transitions in your environments and make them feel natural.
This is what my plan looked like in Week 1:
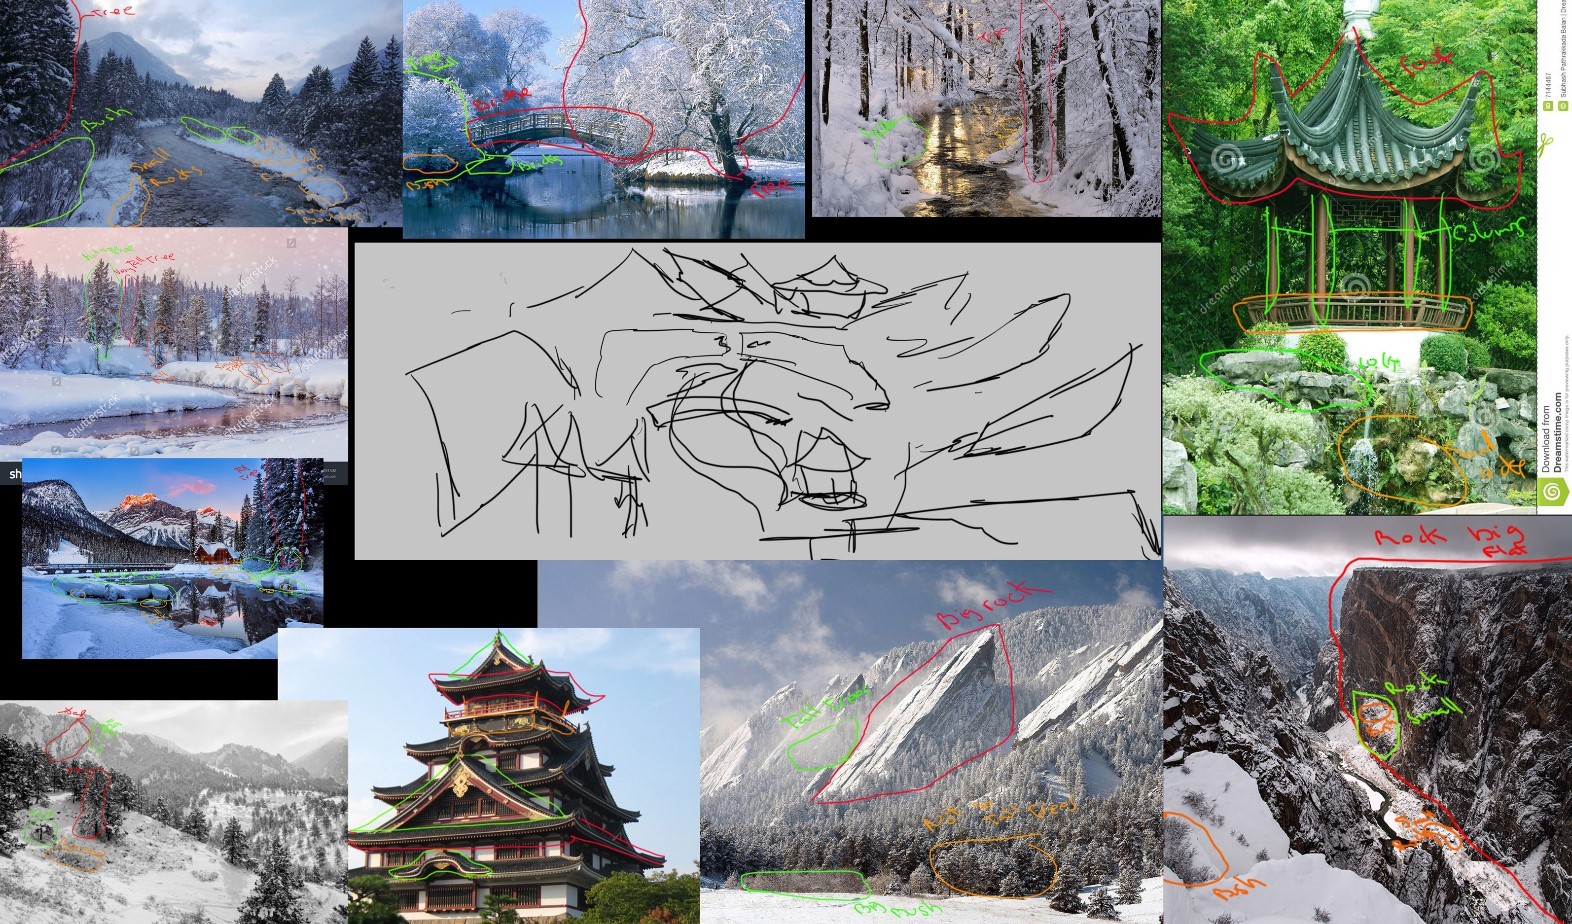
By learning to break down the reference into these 3 elements, I was able to create a small number of assets that I know can work together. This is so important because it will save lots of time by not having to create unnecessary assets by knowing you have your 3 elements covered.
Using these elements to create the blackout helped a lot to have the transition to Unreal 4. I can import everything as a whole, and the bigger shapes individually to start blocking it out in the engine. I will share my biggest takeaways by the end of the post but this helped a lot in figuring out the space and working in a small section of your environment.
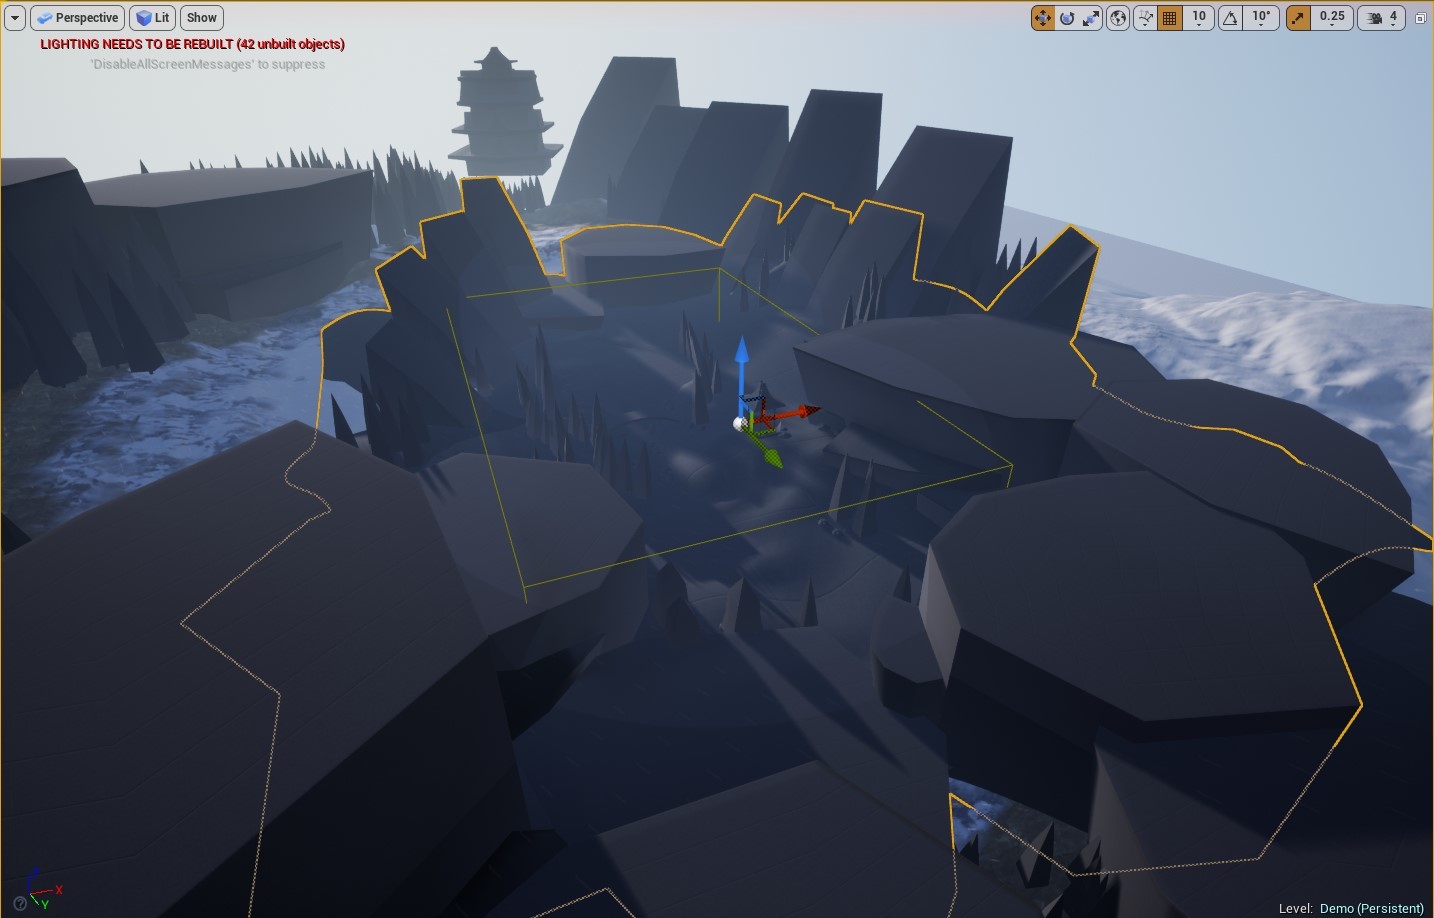
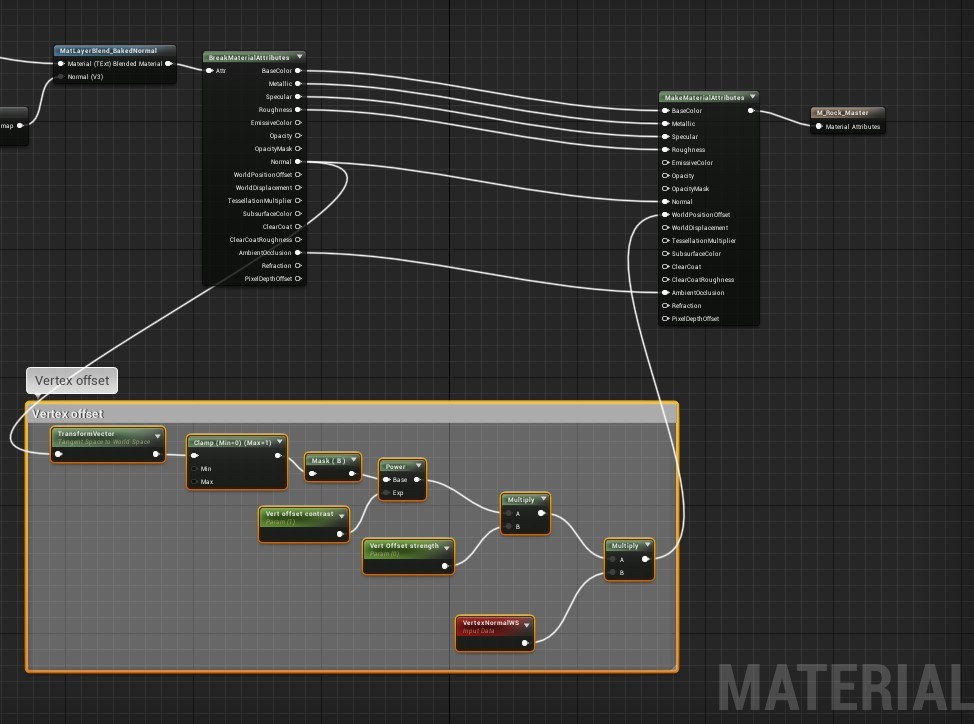
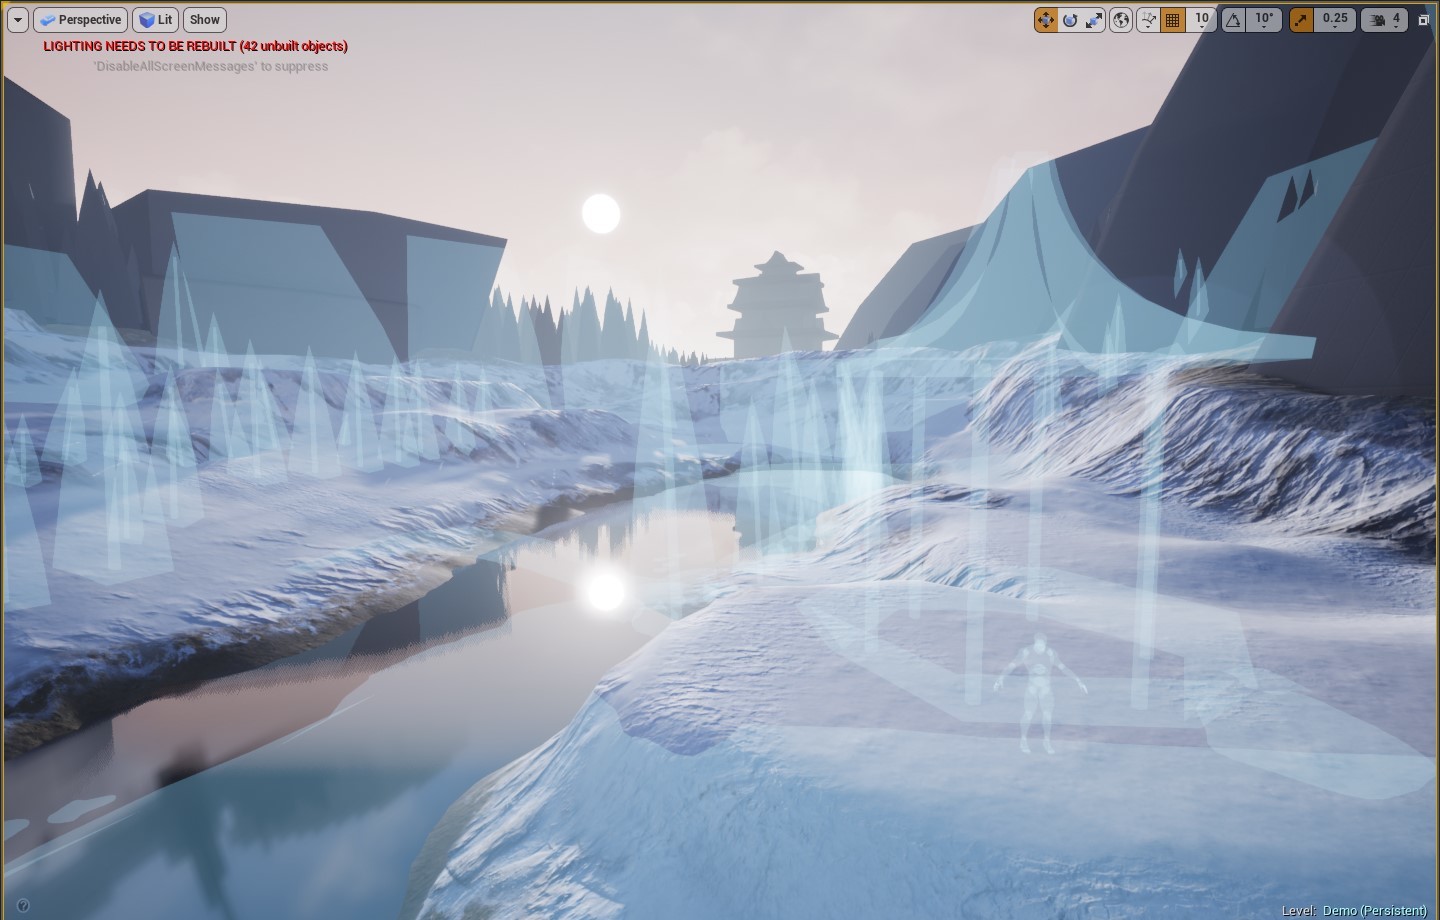
I can use a transparent material to have my blockout there while I sculpt the environment:
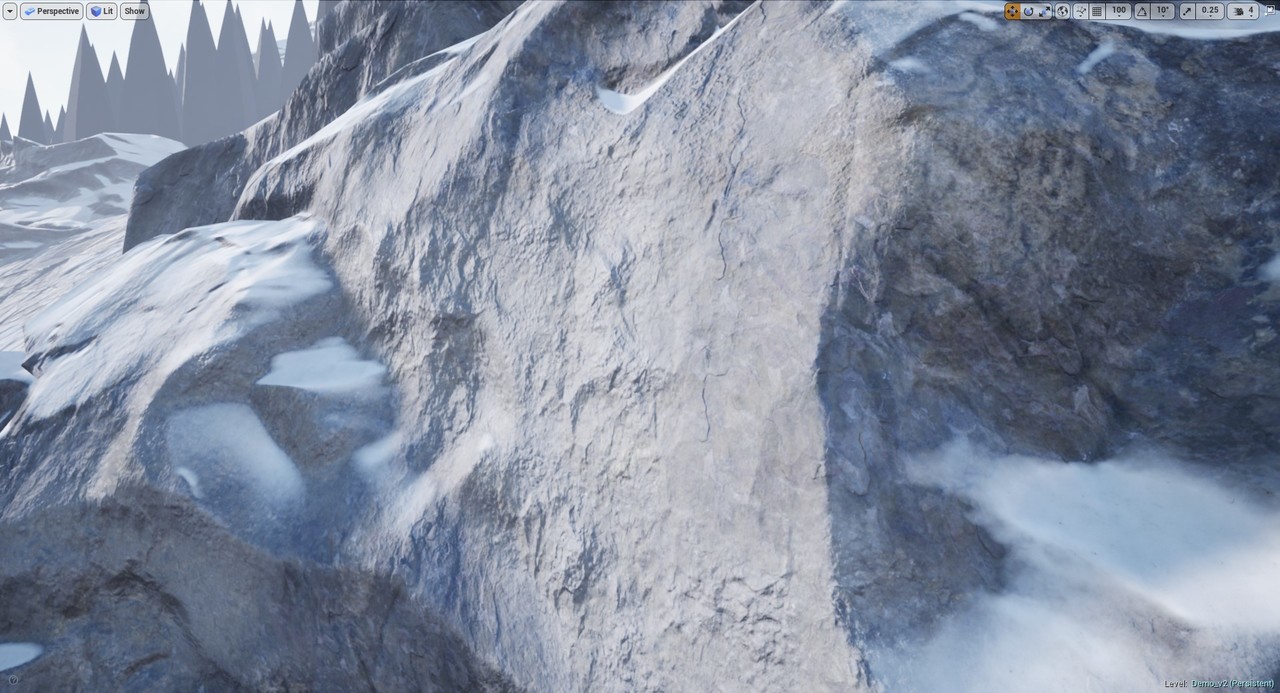
This brings me to my next biggest lesson in this course: Unreal Engine 4 Landscape Tools are amazing for game development
Sure, I knew they were powerful and you could create beautiful environments by using the landscape tools. We are suggested to use Unreal 4 landscape tools instead of going to a program like World Machine and generate beautiful heightmaps. Again, I was a little skeptical about it since World Machine creates beautiful landscapes. But I went with it and I learned a big lesson: Unreal landscape tools may not be the best for creating beautiful images, but they are incredibly powerful when you want to create an environment that is actually playable.
This is so important. As a level artist, you can’t skip the process of level design. It is not common to use World Machine to start creating a game, it is nice for a portfolio piece and maybe it can work as a starting point but when creating a game you need to design an actual playable level.
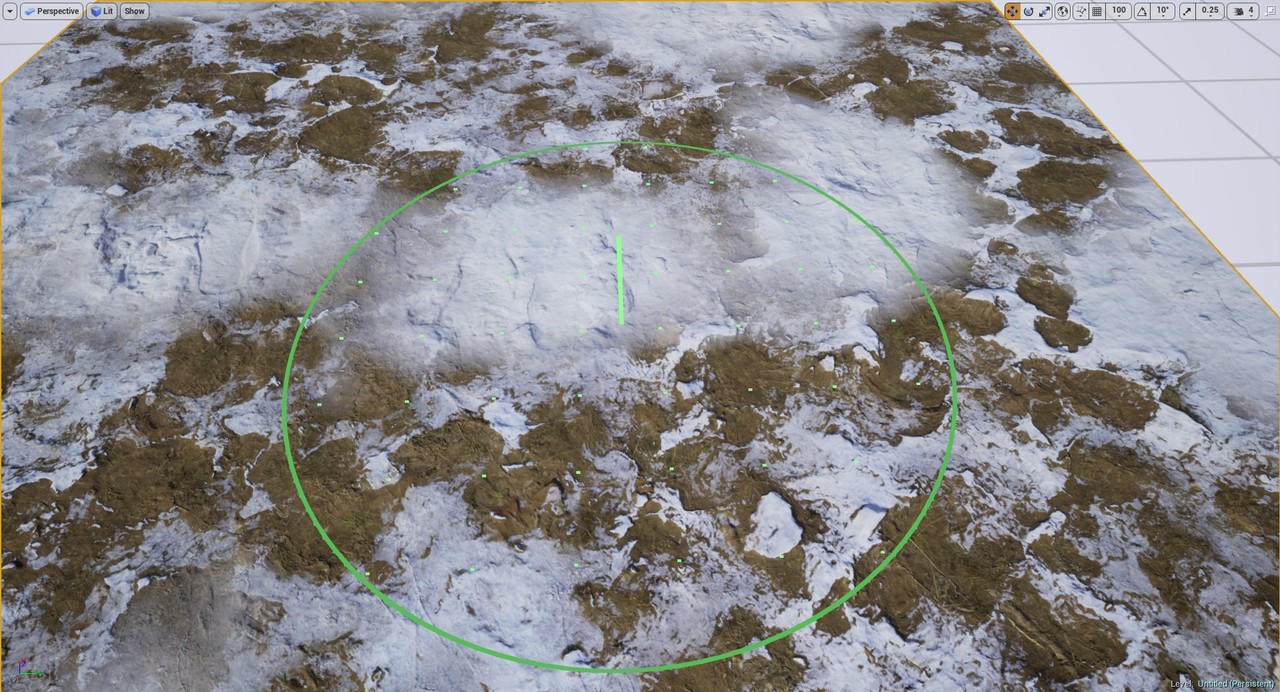
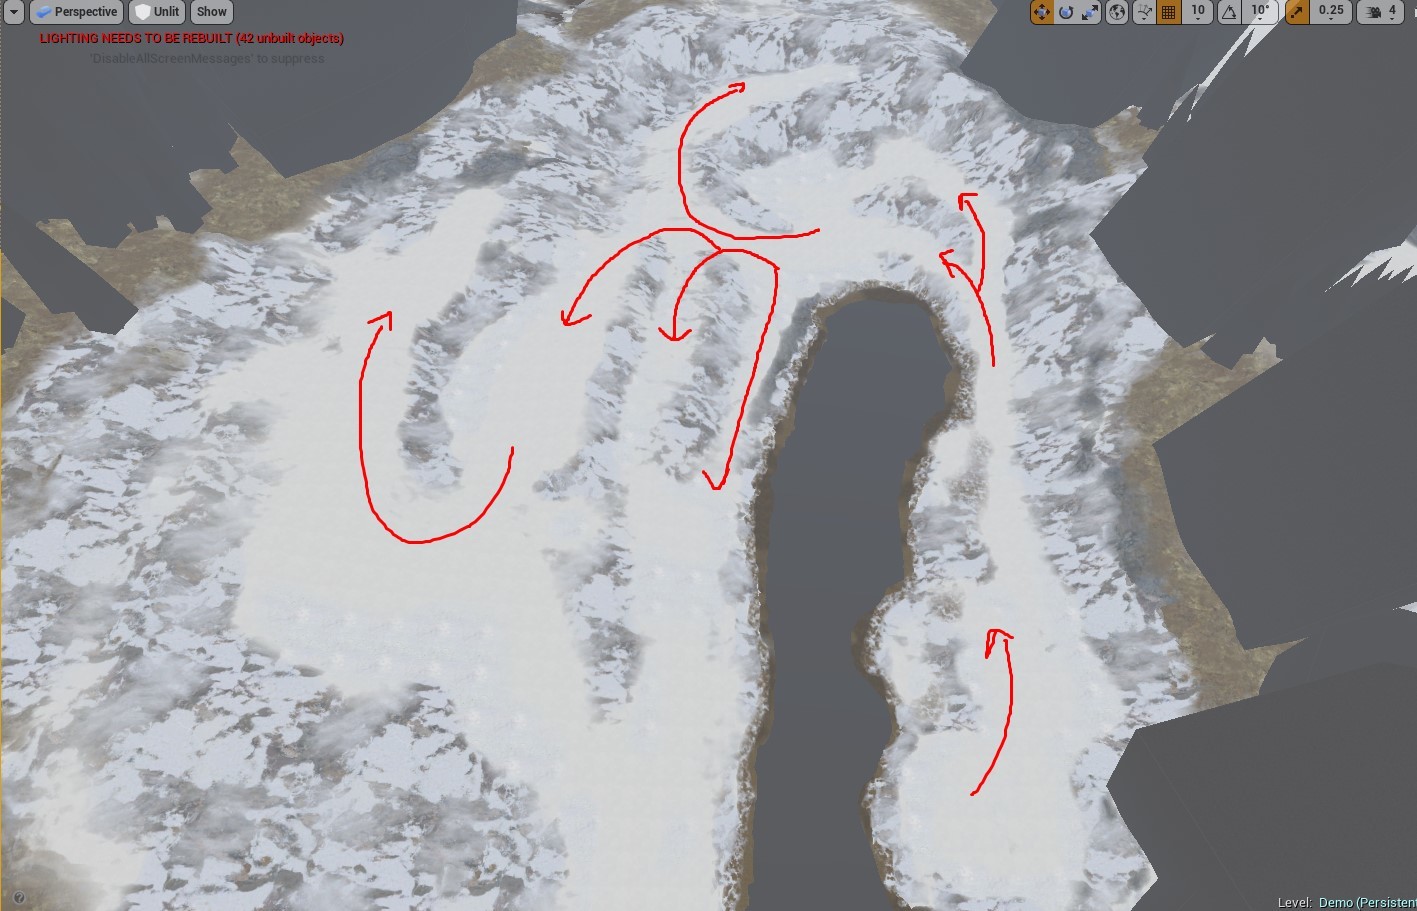
Unreal landscape tools not only helped me to sculpt the playable terrain but painting with different layers helped tremendously to design the level and actually differentiate the paths that you can walk and the paths that you are not supposed to go. When creating an environment, our goal as an environment artist is to guide the player from one objective to the next one. Creating a big world can be a problem because the player has so many choices and can get lost easily.
By using the painting and sculpting tools you are not only creating a great environment by using Unreal’s powerful material shaders. But you are also designing the level as you sculpt and paint. **This is so much fun, I actually found it more fun that sculpting on Zbrush! **It is like killing 2 birds with 1 stone: level design and level art that actually works.
There is still a lot of insights learned in the course and it can take a while to write a detailed article about them, so I want to put my biggest takeaways so far. Feel free to ask any question or comment below if you want me to explain in more detail. Biggest takeaways:
- The job of the environment artist is to enhance the design of the game by helping the player moving from one objective to another
- Working with designers is key to create good environments
- Transitions in the materials can make it or break it
- Unreal’s landscape tools are designed to create game levels and they make a great job
- Focus on primary, secondary and tertiary elements for your game environment
- Creating a blockout in a 3d modeling package will help you to start building your actual environment in UE4
Until next time!