Cinema 4D Workflow

Hello there!

I have a couple of questions and a couple of things I already found out about the workflow with Cinema 4D that I would like to ask and share.

First off - Question Time!

  1. Smoothing Groups
    I have an issue with the smoothing of objects. Now, the problem with C4D is that - unlike 3Ds Max or Maya - there is no such thing as “smoothing groups” in the fbx-exporter.
    After a bit of research I found that “smoothing groups” equals the phong tag. So, I add a tag and export but I still get an error message and the objects do not look correct. Do I need certain settings in the phong Tag to have it produce the right results?

  1. Placing the Objects
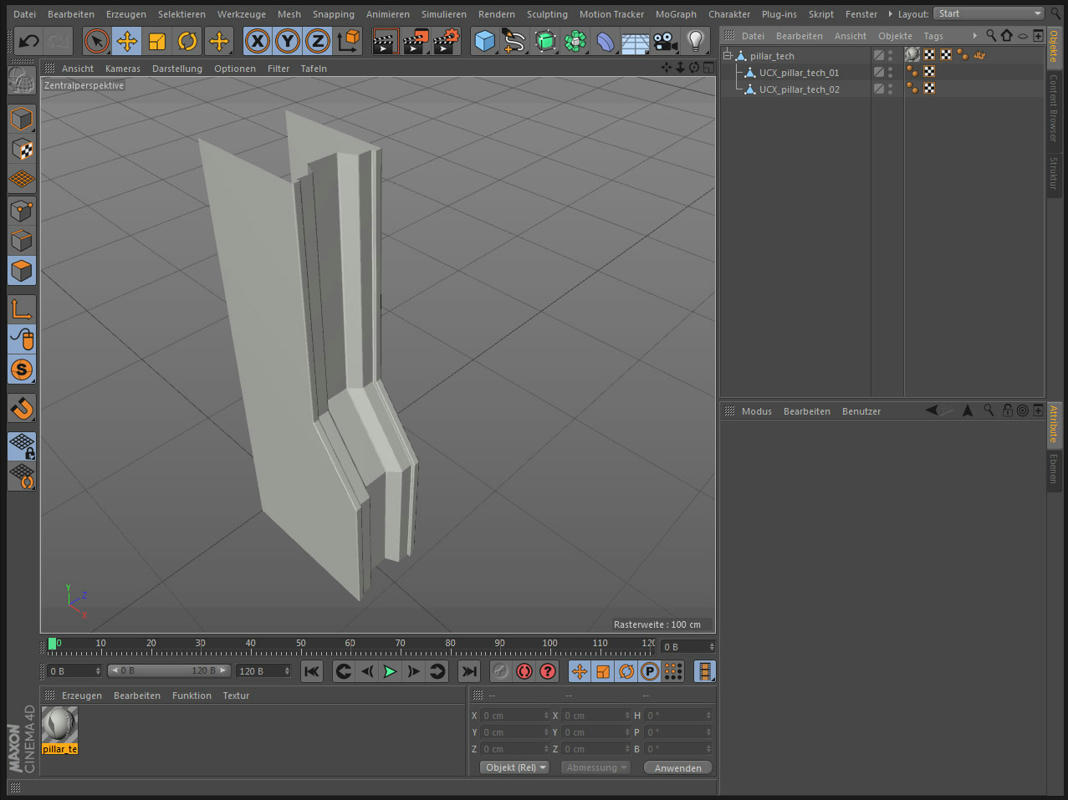
    I want to build my level architecture and assets in C4D, do the UV Layout and export the entire scene in one scene and import the file so I can control each object individually. So far no problem. (Do not combine meshes on import to achieve that)
    Now the question: I have all the objects I want in UE4, but how do I get them into my level editor.
    If I do it for the first time, I can select everything in the Contentbrowser and Click’n Drag it into the viepwport. Now I have everything in the Scene. Now I can select (or simply not deselect) everything in the Scene Outliner and “Group them” / Ctrl+G . If I now select said group I can for example set that to 0/0/0.
    But this group Pivot is in the exact middle of my geometry.
    Is there some proper way to determine the exact placement of all the objects (relative to my C4D Origin that is?)

*Workaround I just thought of and which does work… what I did was create a Cone, flip it 180 degrees so it stands on its tip, put the pivot to the tip and put it to 0/0/0. Then I imported the geometry to UE4 and while having everything selected draged the big cone to the origin… workaround that’ll have to make due until I find out a better way… *

Everything else that I were to add if I edit anything I could probably just place by hand or simply copy the coordinates for once…


Now a few things I found out and had to google a lot to find it properly…

A) UV Layout for Lightmaps

To have less to no problems with lighting in Unreal you need two sets of UVs. First one for the textures and materials, second for the Light/shadowmaps.
The first UV tag (Index 0) can have overlapping UVs, no problem.
But the second (Index 1) needs to be absolutly clean, no overlap or anything. This is easily done.
Simple create the UV tag
(should you work with Cube/Sphere Mapping etc, you can easily generate the tag by right clicking on the material and saying “Generate UVW Tag”.)
name it UVW 0, CTRL+ LMB click’n’Drag to the right and thereby create a second one and name this Tag “UVW 1”.
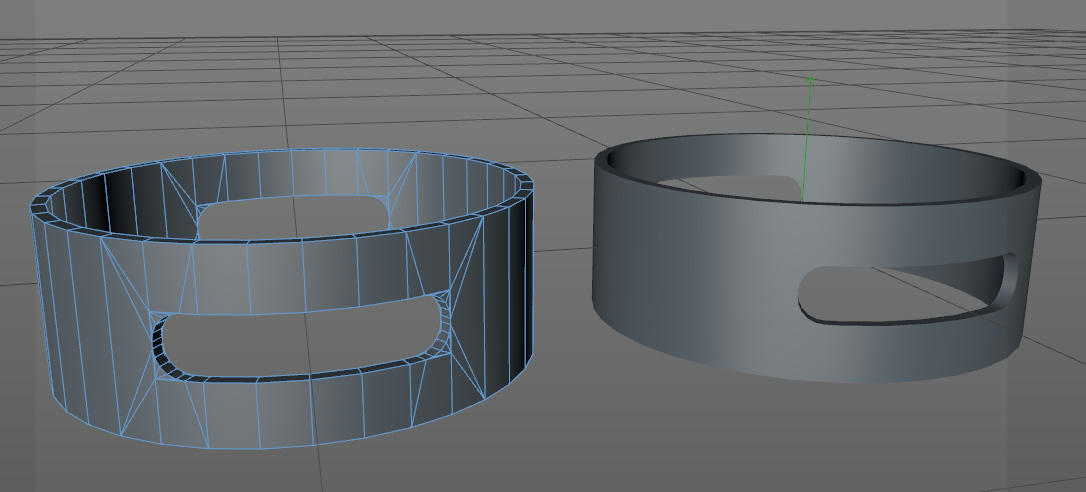
Then go to Bodypaint (Layout panel -> BP UV Edit).
Now you select the object, select all faces, click on the second UVW Tag and in the “UV Mapping” Editor window in the bottom right go to the “Optimal Mapping” Tab.
Tick the box next to “Optimal (Cubic)” and hit apply.
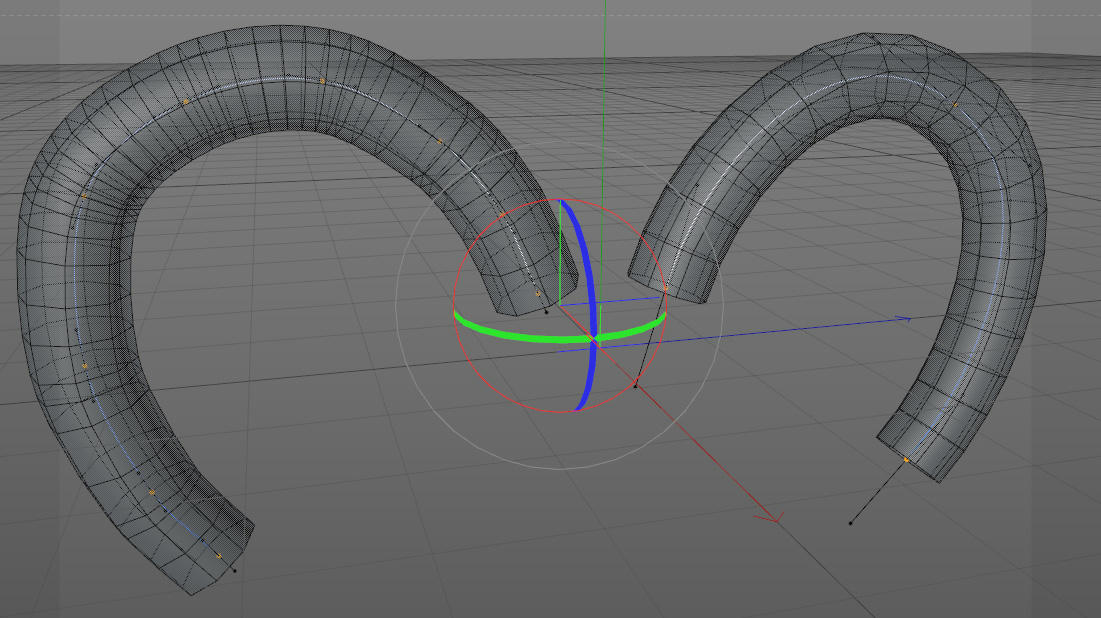
Depending on how high res your object is it may calculate a while but then give you a nice and clean UV Layout :slight_smile:
Aaaaand you’re done.


B) Multiple Materials on one object

Sometimes you might want to have multiple materials on one object.
That is a little fussy in C4D, but basically no problem.

Let’s say you want to have three materials on one object, for example a wall, with a window(glass) and a windowframe.
What you will need is :
3 Texture Tags
3 Polygon Selection Tags
2 UVW Tags.
and of course 3 Materials.
First you do as you always would in C4D.
You set the selections for the wall, the window and the frame and name them accordingly.
Add the textures, restrict them to the selections and map them (i.e. via Cube Mapping)
Note: Maybe I have done something wrong here so far, but for me it has never worked if I use external renderer materials as in VrayAdvancedMaterials, I always had to turn them back to “normal” C4D-Materials for this to work.
Now you need to turn the mapping into UVW-Mapping. This is easiest by right clicking the first tag and selecting “Generate UVW Tag”. For the other two tags, right-click and “Assign UVW Coordinates”. Now you have one UVW Tag that holds the information for all three tags.
Now comes the “fussy” bit. To have Unreal properly import all the materials and tags etc in the right order we have to give them names. What I do is I name them by index.
First we name the Texture Tags 0, 1 and 2. Now we name the corresponding selection Tags 0, 1 and 2
*Note: Don’t forget to reconnect/rename the selections in the Texture Tags as well… C4D is not really dynamic when it comes to Tagnames… *
For a little more transparency in the project also rename the Materials.
I.e.
Tag 1 is Glass –> M_1Glas
Tag 2 is the frame –> M_2Frame
Tag 3 is the wall –> M_3Wall

You can name it as you want, just make it so you understand what you are doing, and also other peoply may quickly understand what you were doing.
Last but not least, do not forget the second UVW Tag for the lightmaps (as described above).
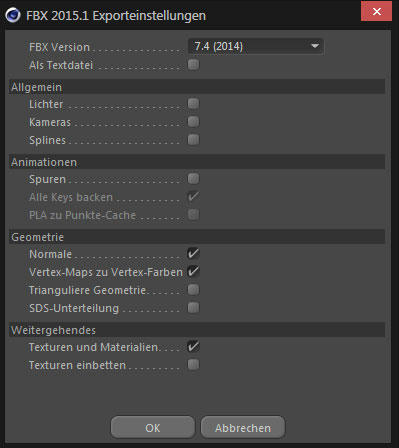
Then export the fbx. Be certain to export the “Materials and textures” and Normals.
Finally, we need to import it properly into Unreal.
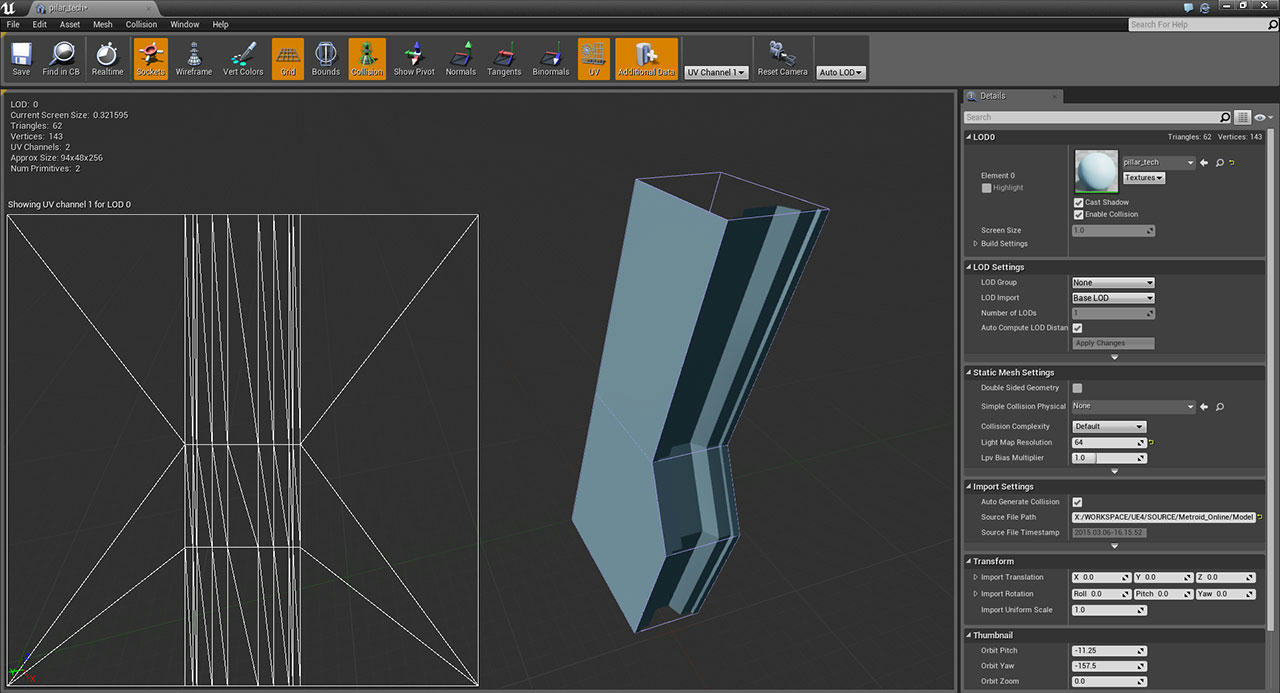
In the Fbx Importer window be sure to “Import Materials” and have Normals set to “Import Normals”.
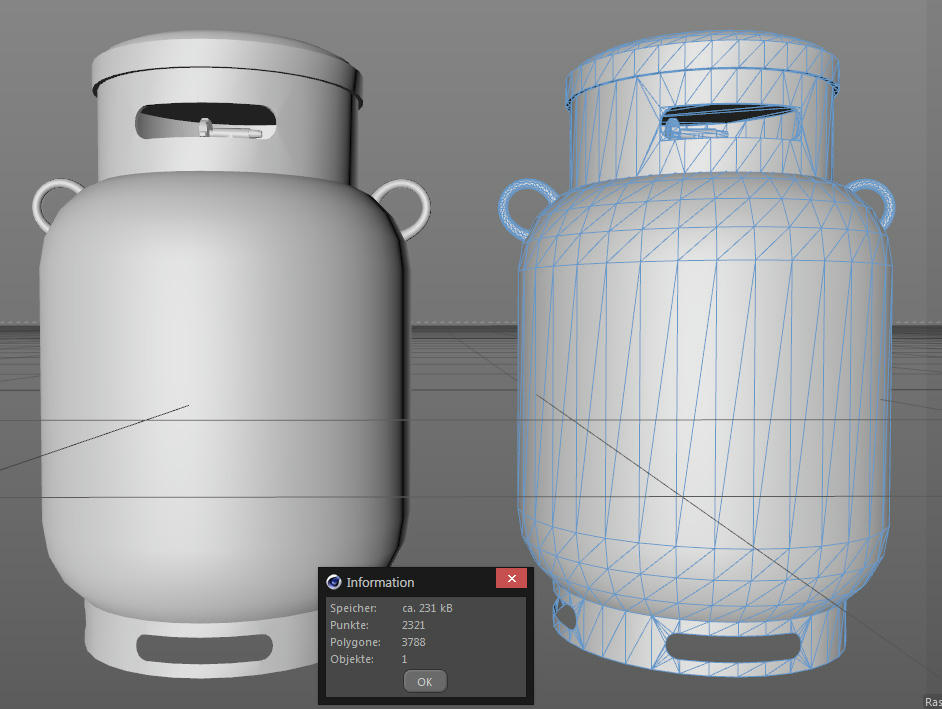
If you have done everything right you should now find an object with three texture elements and two UV Channels, next to three materials named 1,2 and 3 :slight_smile:


I hope this might help some fellow C4D users struggling to find their way into the Unreal Engine 4.
I also hope that some more experienced C4D users can help me with my questions up top.
If anyone has anything to add to what I wrote or may want to correct me where I was wrong, please do so! I will keep an eye on this thread and update it if needed :slight_smile:

Thanks already and I wish you all a great day :slight_smile:

Greetings,
of

Just wanted to say a massive thank first for how useful this post is to most of C4D users. I have spent days and days on the interwebs to find this specific piece of information, especially when working with multiple textures over an asset.

My two cents regarding smoothing group : The only solution I have found is to download the “Riptide pro” plugin, export as obj and then import it in UE4. This solution costs 50 bucks however (but the 30-days trial helped). The obj to fbx from autodesk doesn’t help either.

I have brought the issue to Maxon countless times, hope that they will acknowledge the problem in the near future and fix these “phong tag” not translating properly into FBX smoothing group export. Or that a gentle soul will make a free plugin for that, I don’t have the coder perk.

All in all, thanks again.

On a side note and with the current R16, it seems that NOT creating a second uv map for lightmaps inside C4D and letting UE4 creates its own can resolve the smoothing problem. I tested this with a simple cylinder and a basic sphere with some success.

Testing continues…

I hope we get some deeper support inside of cinema 4d for unreal. I’d love to be able to export vector fields, for one. X-particles can display the desired info and turbulence can create the movement, but there is no way to export the info into the confusing format that the maya and 3ds max export. I have gotten great results with Houdini, but with the upcoming Houdini engine for unreal I really haven’t spent much time on a hfx >> unreal pipeline.

However the cinema to unreal pipeline needs love.

Can someone explain to me how we can make bounding boxes in Cinema4D for Unreal? I know this explanation (https://docs.unrealengine.com/latest/INT/Engine/Content/FBX/StaticMeshes/index.html#collision), but unfortunately it doesn’t work for me. Is there a tutorial or some screenshots? Thanks!

Some news today with the new update… Doesn’t seem to adress our issues, but progress nontheless :

Dynamics simulations are now supported by FBX export
MoGraph animations are now supported by FBX export
Fixed an issue with exporting Cloth to FBX
Fixed an issue with splines in FBX export
Fixed an issue with FBX exporting performance
Fixed a stability issue with exporting Character scenes to FBX
Cloth simulations are now exported to FBX as vertex cache animations

Allright, since i’m using Cinema 4D in Combination with (previously) UDK and now UE4 too, here’s a rundown for Static Mesh Export and Import.

First of all i’m using C4D R16 as well as UE 4.6.1 for this example.
R15 might work too, as long as you’re able to use fbx 7.4

Pay attention to the hierarchy in the Object Manager, as well as the Tags applied to the model and the naming convention for the collision model.
The Model itself has two UV-Tags, first one named UVW second one named LightMapUV.
(guess it doesn’t really matter which name they have, as long as they don’t have the same name)

The Normal Tag was created by using Vertex Normal Tool Lite,
which is the free version of this awesome tool, no c4d game content creator should miss out on.
It’s basically a way to fixate/bake what you did previously with phong angle and phong breaks.

The UCX have a phong angle of 180°, otherwise they might throw a two-dimensional geometry error at you.

Export Settings:

Nothing fancy, just make sure to use 7.4, take out all unrequired stuff like lights, camera, animations and make sure normals are exported with the fbx.
Triangulation should be done before applying the normal-tag, otherwise it’ll break the shading completly.

Import Settings for UE4:

Since we have a lightmap, we don’t want UE4 to auto create one for us.
Deaktivate “one convex hull per UCX” if your Collision Mesh is made of more then one UCX.
Not sure why, but it’ll cause one of your CM parts to wrap arround the whole Object.

You’ll still get that warning message, but you can ignore it.

As you can see, everything is allright with the smoothing, CM is in place and we have 2 UV channels.

If you don’t belive me and/or wanna try yourself, here are the files:
http://www.mediafire.com/download/62964rt9v3vcwvp/C4DtoUE4_SM_Test.zip

sorry, double post. thought the first time it failed.

Thanks for these great explanantion. I am also a C4D user ans would like to see a better “pipeline”.

I am also using substances for texturing and it seems that there will be a plugin for cinema4d soon. This could be a good start…
b3e421146abd4aaafa04c8fcd08cbe426dc290ee.jpeg
this is the related post: https://forum.allegorithmic.com/index.php?action=dlattach;topic=1644.0;attach=6958;image

Follow up questions…

Was able to post on my iPhone, but not on my Mac. ???

@Kraid, thanks for sharing your workflow with C4D. I was wondering if you can elaborate on your image that shows the hierarchy. I can only guess that the two child objects are copies of the original mesh? I see each one has it’s own UV tag too. Does each tag model represent each tag from the parent? You also mention to take note of the naming convention for the collision model. Which is the collision model? Is there any differences between the child objects? I have many years with C4D, but am only beginning with UE4.

Thanks for any clarification.

–Alex

One more thing, in my testing the materials didn’t actually come through I think. When the model appeared in the content browser it looked like it had a material for a split second, then went white. I checked in the material itself to see if maybe there was some sort of lumicance or specular issue, but it didn’t appear to have the PNG files hooked up. What am I missing here?

As long as there are the same ammount of materials imported as the exported C4D mesh has, everything is allright.
You need to import the textures and assign them inside the materials.

Edit: as for your first Question, the hierarchy shows the mesh with the collision model as child objects.
They are just simple convex shapes. Wouldn’t really need an UV Tag i’d say, but the phong tag with 180° angle is vital for not having a “two dimensional geometry” error.

THanks for the tips Kraid and I am make a Learning C4D Tutorials Videos | Cinema 4D in Gaming Development World for C4D Community
i will make a video on your helpful tips bro , My page : Ap Ashton TheCreator - YouTube
Cinema 4D in Gaming Development World for C4D Community Coming Soon!
[video]https://www.youtube.com/playlist?list=PLyduHTtwyll_HT6Vpbts9rqMk6CkV0kxH[/video]
v=uL_7CXnXtFM

Cinema 4D | Game Level Creation Series Introduction
v=qP7qnhruSo4
enjoy the Series

A Update:
Exporting to UE4 from Cinema 4d with c4d fbx 6.1 2010 and it works like a Pro ,it export the textures and even the textures are compiling it right, every is be setup Color channel, Luminance channel, reflectance or Spec… channel and Normal channel for the material, works fine, also no need for creating Light-Maps because if you add it, It will not work, just let UE4 generate light-map for you in importing process, which is great and everything works fine. But now when I try to use 7.4 2014 or 7.5 2016 , it dont work right.
Also you can only use R16 and R17 fbx 6.1 2010 for method to work.
v=2WKfwIddFPI

Select N’Go v2.0
v=id7JHjayVa4

Beta tool:
C4D to UE4 Beta
v=N3wQXLKjSoI

Youtube is blocking the video for German users because of the music you’re using in it.
Maybe try to find licence free music for future videos.

I’ve watched some of your other videos though and noticed a lot of stuff that isn’t exactly optimal in terms of game asset development.

e.g. in the video where you export a map to UE4, you choosed to export whole chunks of the walls and auto create lightmap UV and collision inside of UE4.
I’d say it’s better to export modular meshes with existing Lightmap UV and collision, then assemble them inside of UE4 to a map.

I’m pretty sure i could replicate your level layout by only using these 5 modular shapes:

Note that this is just a quick & dirty sketch without to much attention to detail and size.
So maybe i’d use one or two more shapes or a little different mesh for some of them.

Another example in your lowpoly gas tank video, your general method is good, but in some places you’re wasting a lot of polygons.

For example the handle is using way to many inbetween points on the spline.
This causes it to look less smooth and have uneven distribution of loops.

Here’s a comparision of your method (left) with how i’d do it (right):

I’m using a 3 point spline with bezier and rather a ngon then a circle spline for better control over the rotation segments.

Also using boole to create holes in the geometry isnt always a good idea.
Again, here an example of mine:

The roundness of it is good enough considdering the prop size, possibly could even be a bit less.
I’d rather invest the savede polygons into usefull stuff.

Judging from your video, your prop has to use a double sided material too, because i don’t see you creating a duplicate of the top and bottom geometry with reversed normals.

…took the time and built a prop:

Still no UV map and texture.

Maybe, when i have time tomorrow.

hijacking the thread a bit - but keeping in the spirit of the title ‘Cinema4D workflow’

kraid - I was wondering if there is any chance you can maybe do a small tutorial on the best workflow end-to-end from Cinema 4D to UE4.
It seems like you have really a lot of knowledge in both, and myself & my brother are doing are first steps here.
(he has some C4D experience).

We’re trying something very basic - he modelled a piano in C4D and we want to import it into UE4,
and we’re having a lot of trouble with the process…

The piano is comprised of a lot of different pieces (meshes?) - the wooden body, the ivory keys, wheels, etc.
How to best import it into UE4 ? does it need to have 2 UV-map channels ? (one for lighting and the other for…?)
Do you import it as a single combined mesh or as multiple meshes and then start positioning it all in UE4 ???

Any tips you can offer will be super-super helpful !

There doesn’t seem to be too much content on the best practices & clear guidelines on importing objects modeled in Cinema4D into UE4…

Well… i thought i allready did that here: Cinema 4D Workflow - Asset Creation - Epic Developer Community Forums

So export/import of static meshes shouldn’t be an issue.
Guess the problem lies more in the basic knowledge of game asset creation.

Not sure if the whole topic could be even compiled into one single tutorial.
For me it was a steady process of learning using a multitude of different resources.

Ok, i think for now i just answer your questions above.

Hard to say anything specific without knowing the model and it’s setup.
One thing you surely need to do is converting the Objects to polygonal meshes and assign them a material,
so that they will get a polygon selection tag for every material when combining them.

I also found it rather usefull to UV edit the more complex parts before combining the meshes and
put the UVs on an empty space outside the canvas.
Preferably one that isn’t allready occupied by another mesh part’s UVs.
That way there won’t be overlapping UV islands on the combined mesh,
which makes selecting much faster.

Trick: do the UV layout for the single part on the canvas then use the transform Tab and move them a full UV space.
First part would be x=1, 2nd part x=1 y=1, 3rd part y=1, 4th part y=1 x=-1… 9th part x=2, 10th part x=2 y=1 and so on.

The final combined mesh will have to use only the space inside the UV canvas though.

Simple answer: if you want a Lightmap on your Model, it needs a second UV Channel.
In some cases it can be copy of the first UV channel, but most of the time it has to have it’s own layout,
following the rules of lightmap UV creation.

…texture. Unless you want your Prop to have only a plain color.
But even then you need a UV-map for it, allthough the layout wouldn’t matter much then.

This depends on the model itself, how it will be used in UE4 and how many parts it consist of.

Usually you will try to have static meshes imported as single objects.

In some cases they might consist of several parts for the sake of variation.
Example: a dumpster that should be placed a few times in a map while some will be closed but others opened.
Each one could be imported as a seperate mesh, but it would also be possible to seperate the hood from the dumpster
and do seperated trash bags, too.

You then can build your own actor with it and possibly even make it doing some things like randomizing the angle of the hood opening for every instance you place.

For your piano, i’d say it’s better off as a single mesh if you don’t want to place it several times with a few alternations like open and closed key cover.

Hi everyone.

I am a beginner in UE4. I am having fun with it.
I have a question about importing C4D static mesh to UE4. The mesh after being imported to UE4, it only can see half of the mesh.
Here is a picture example show the result. How can I fix it?

Hi chandleryang,

first of all i’d suggest you to use the “print screen” button to take screenshots, instead of photographing your screen with external devices.
It’ll store the snapshot to the clipboard and you can paste it in any picture editing app you want, even MS Paint will work.

As for your issue, I guess you have used a Lathe-Object or something like that to create the shape.
After converting the generator to an editable polygon object, make sure that the face normals of all polygons are facing in the right direction.

In polygon mode, select>select all.
Orange tint means it’s the front of the face, blue tint means backside.

It’s possible to use the align normals and flip normals commands to fix the orientation of the face normals.
You want all of them facing you with their frontside outwards ofc.

In most realtime engines, the backface is culled by default, which means it doesn’t render.
(you can have that in Cinema too by enabling/disabling the culling in the Viewport options>backface culling)

There is a Material option too, that enables the rendering of backfaces on a mesh, but this should only be used if it’s really neccessary.

Thanks for the tutorial up top there ! I’m having issues getting multiple materials into my UE4 scene.
Here is what I’ve done, maybe you can spot what I haven’t:

Created 3 materials
Created selection tags
Applied materials to object and added selection tag to texture tag.
Created UVW tags 0 and 1.
Export/Import.

Here is the naming I used:

Material: Mat0, Mat1, Mat2
Texture Tag: 0Red, 1Green, 2Blue
UVW Tag: UVW 0, UVW 1
Selection Tag: 0Red, 1Green, 2Blue

When I import the file into UE4, the materials come with, I can see them in the content browser, but my object only has 1 texture slot when I open it by double-clicking. Does anyone have any ideas?

Edit: It seems like the main issue is not getting multiple materials in. I can do this so long as I only have 1 UVW tag. As soon as I add another UVW tag for my lightmaps, it does not recognize the other materials applied to the object. Perhaps there is an issue with the import process where UE4 can’t tell which UVW tag the materials were using?

I am using R16.

Have you tried to rearrange the Tags?
I had to place the Material Tags at the left before any other Tag to prevent a error message at Import.